MassiveVoodoo
Member
- Joined
- Jan 10, 2012
- Messages
- 7
Good morning jungle,
today MV's year of the painter brings you another tutorial, with tons more to follow
This time a rather quick base step by step of the base I did build for the High Elf I painted during private coaching with Roman from Russia.
During the coaching I just painted the figure without an idea about the base yet. I did build a little gaming base during the coaching but gave it to Roman. I showed him how to paint my wet and wet technique to it and primed it again so that he would have space to test it too. He did not finish it so I thought to give it to him as a gift. Long story short: I was in need of a new base and wanted to do a quick one. So I collected some material from my stock that I might use. Important on that point is: You need a basic plan about your base, for example: a forest base, a dwarf mine or imperial town. My idea was to do a little scene in an High Elves temple that was under attack.
A Plinth, some cork, some white plaster parts, some wood pieces from canvas painting, a skull, etc.
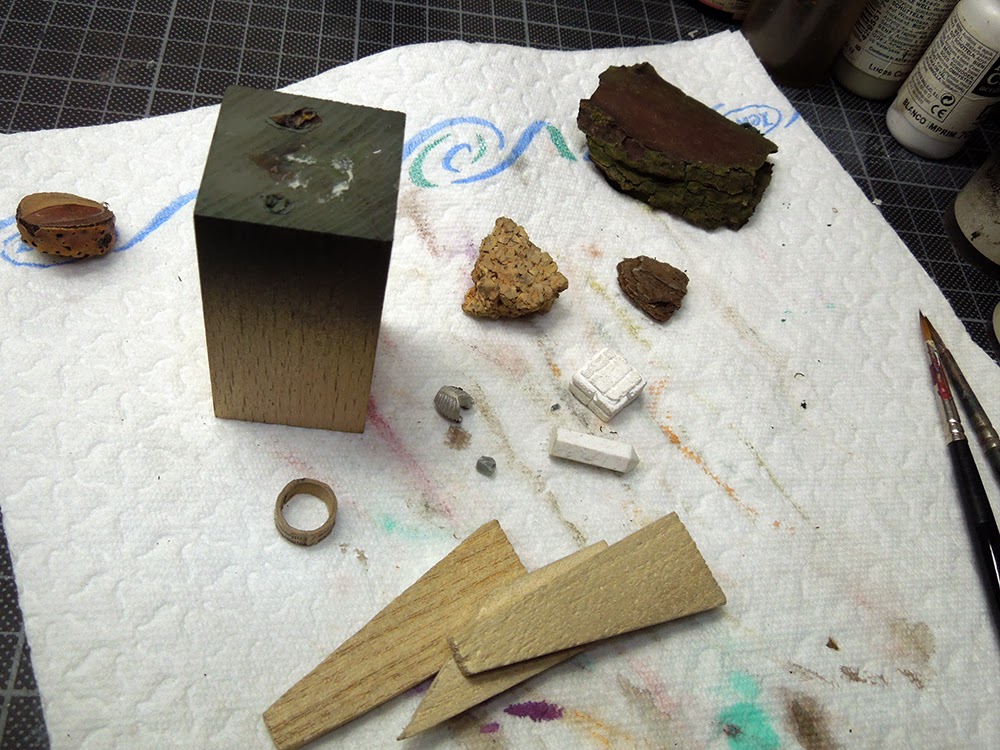
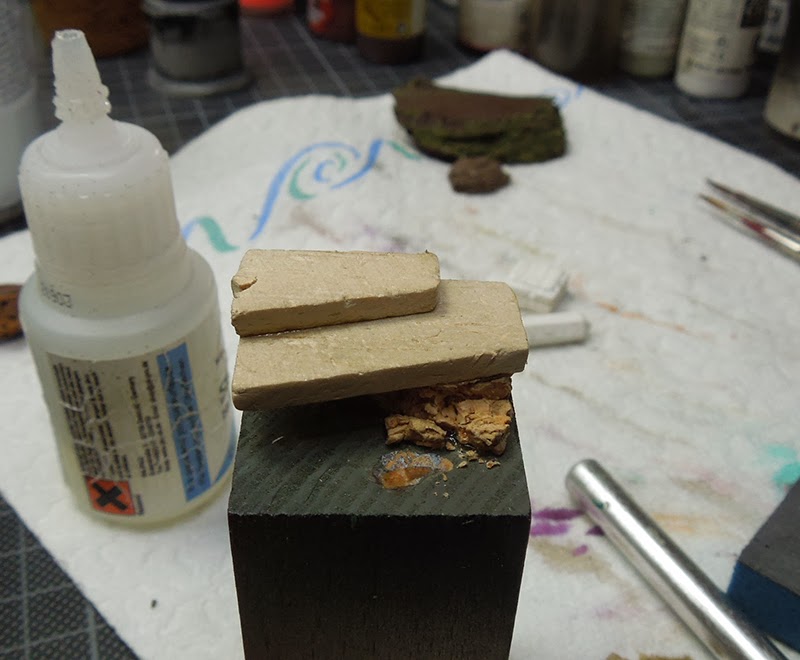
Well so far for the inspirational brainstorm. I ended up with glueing together some stairs from the wood pieces on top of some cork.
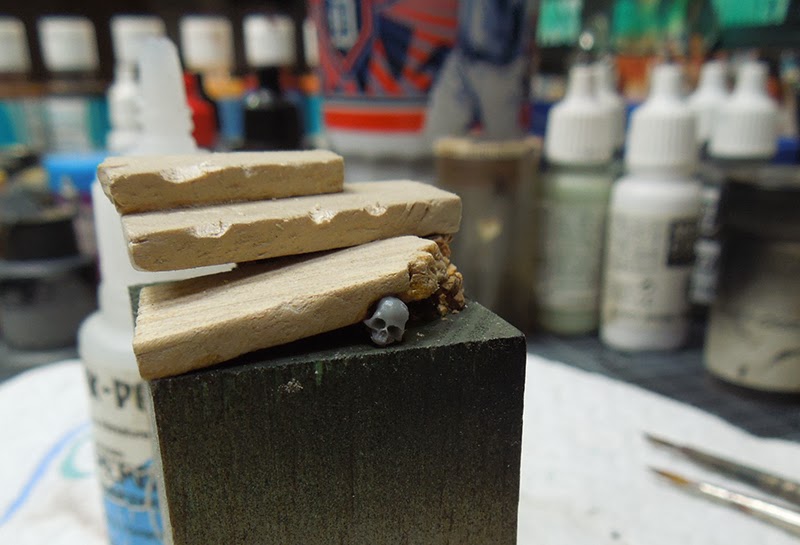
I went on with adding more. Therefor I had to cut the wood pieces in shape, so I did with the use of my scalpell. The skull was also added. You might recognize the stairs hanging in the air like Michael Jordan to the the back of the base. No problem yet. Will fix that later. It's a quick base, not a super ultra cool base, just a quick one. I also added some damage to the wood pieces as those stairs are planned to be over ninethousand years old and ... well, yeah they got to look old and this also brings in detail I can paint later on.
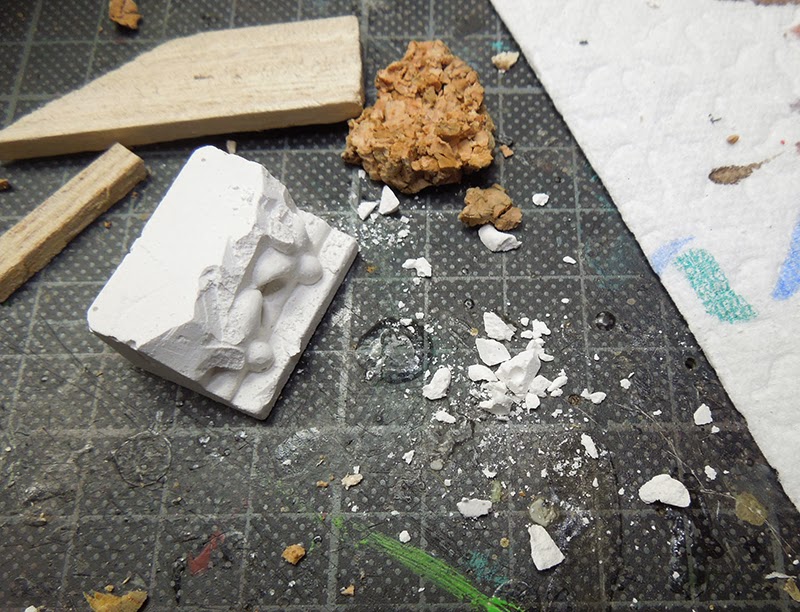
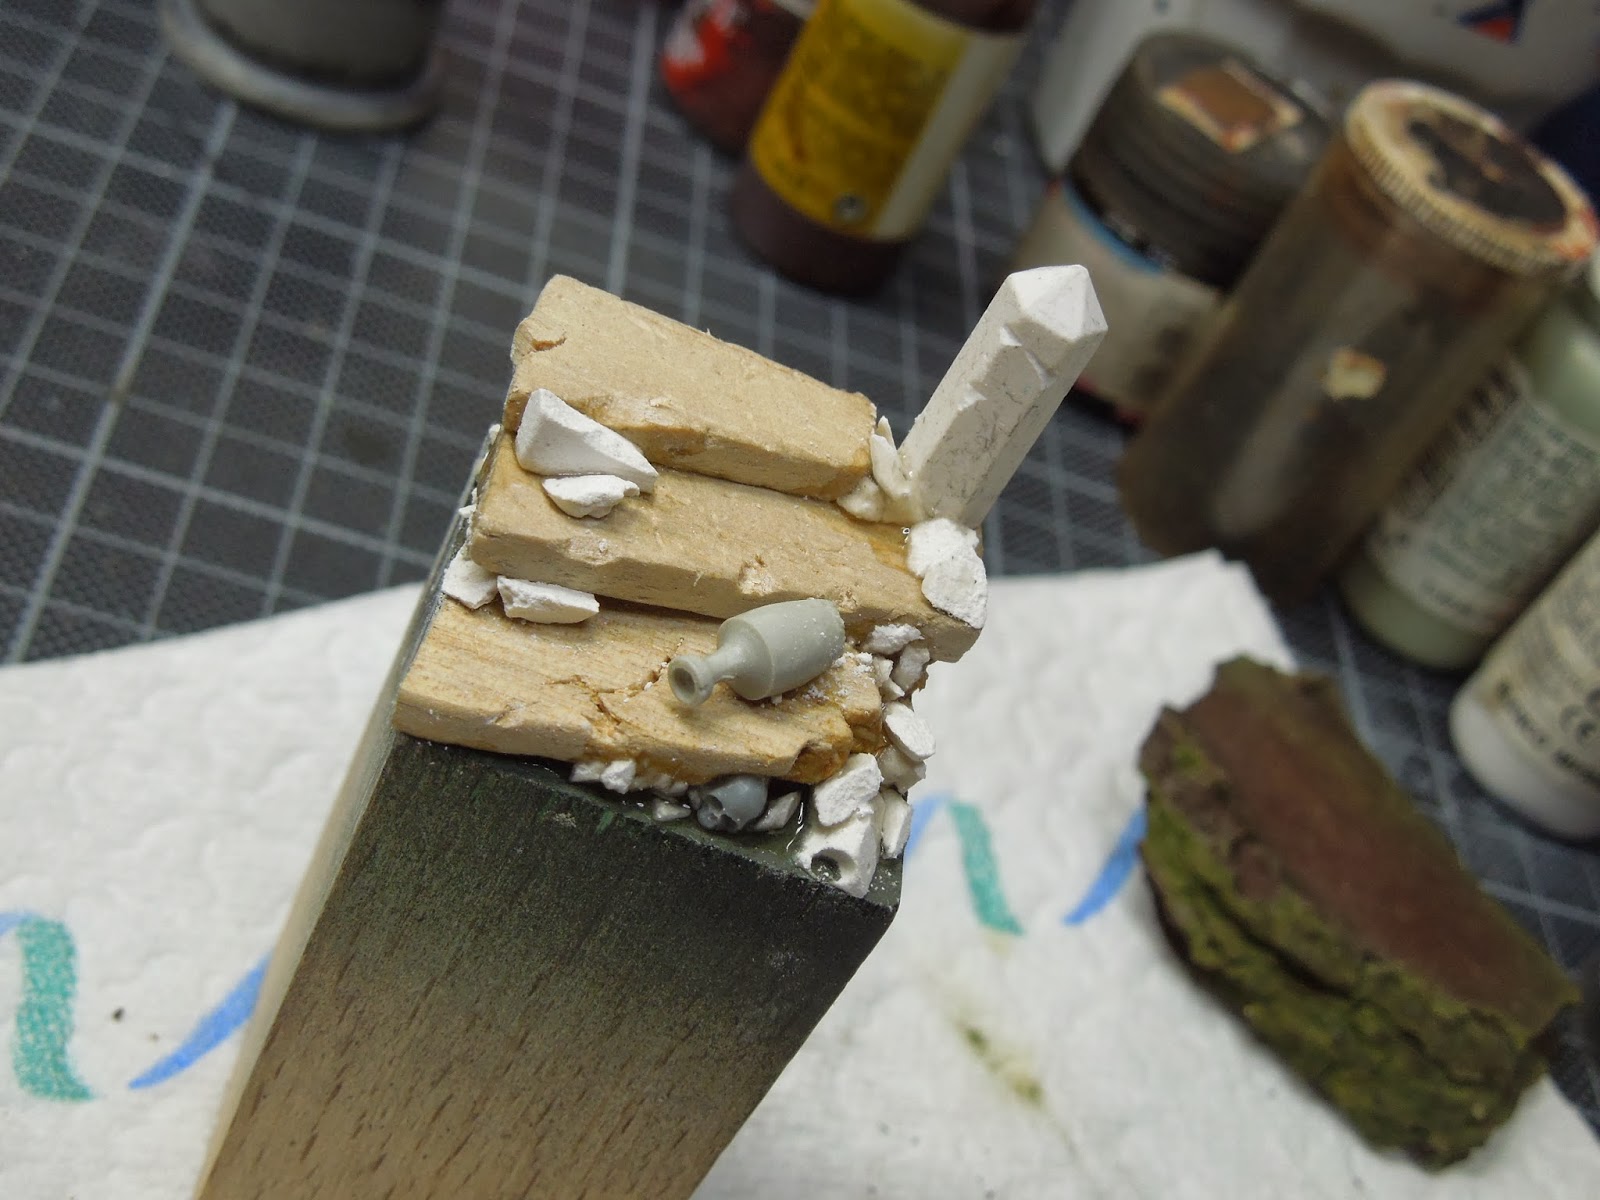
Some more work was done to to it. I used a white plaster piece to add a little column. Used another white plaster piece to cut wildly to recieve some small debris. As you can see the column piece also recieved some scratches and some more were applied to the stairs. A bottle was added. Sadly I don't remember the company who makes these bottles :/
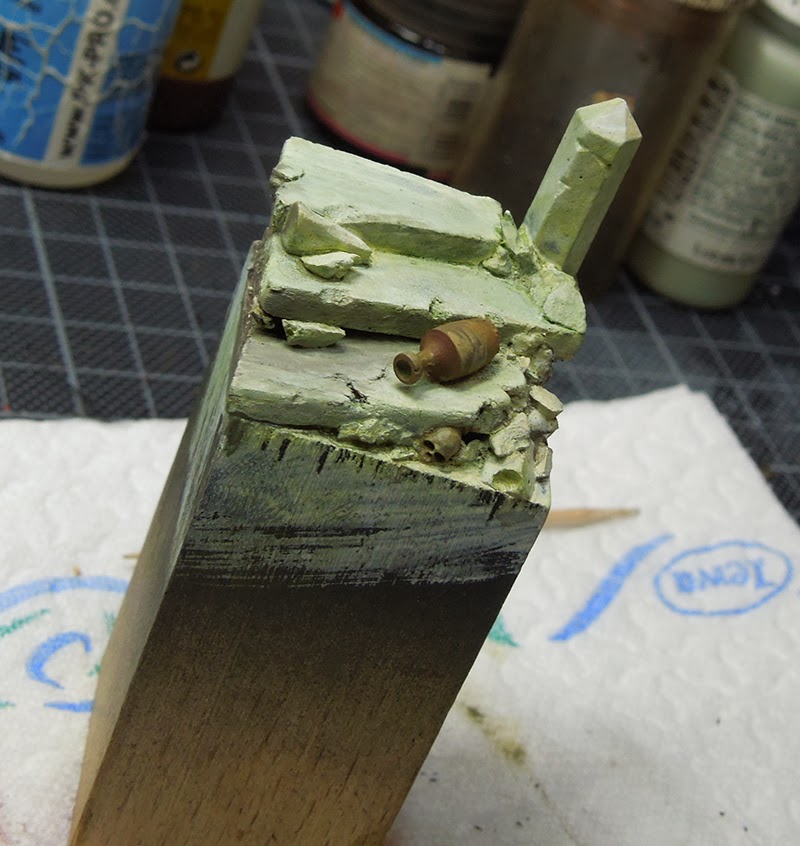
The gap in the back of the base was filled with cork and debris glued to it.
After priming a quick brushwork delivered a very bright basictone to the base. Dirty, yes - for the moment. Sketching the bottle and the skull too. Plow! Plow!
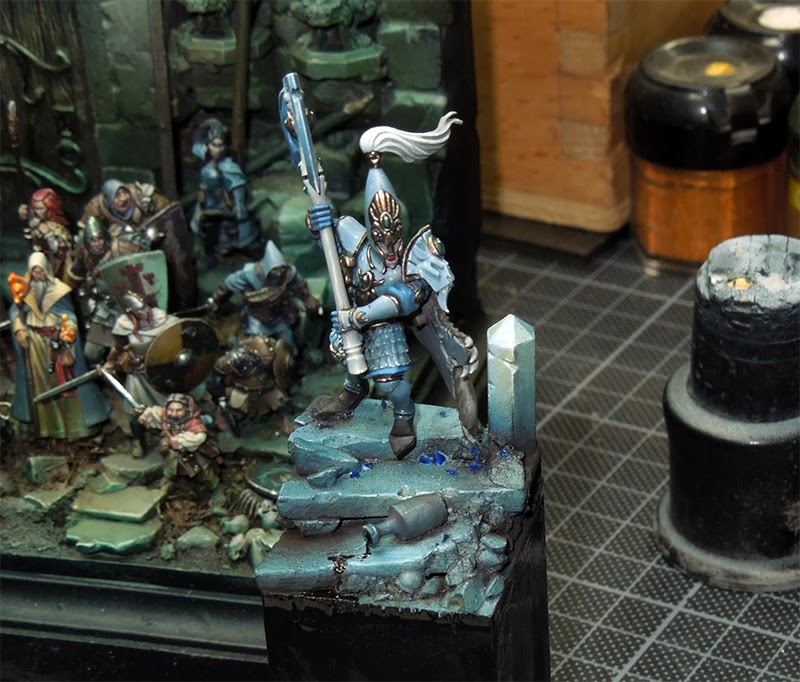
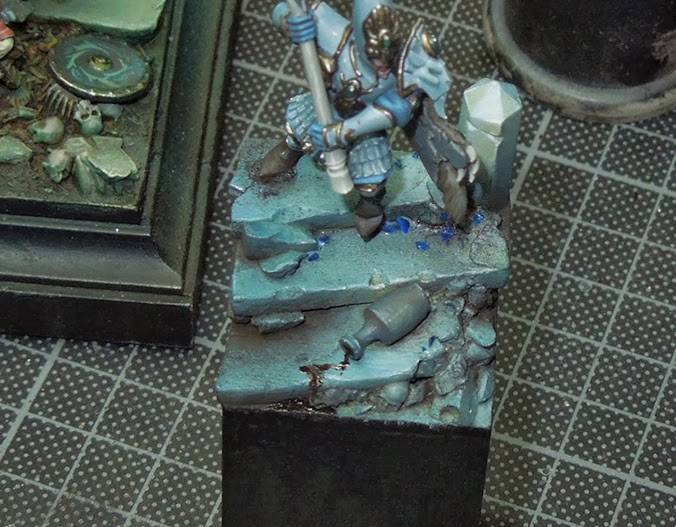
This bright undertone was well planned. I then used the airbrush to spray several thin layers of blue to it to stain the whole base in a cold moonlight situation. Pft! Pft! Starting from a bright blue first and going darker in about 3~4 steps. Again using the brush I painted a little light situation to the base by using my bright blue again and making it even brighter by adding a little white to it. Concentrating on final edge highlights with mainly pure white.
I did not go dark enough in my oppinions so I took some black/brown pigments to the strongest shadows of the base to make it dusty. Working with pigments on a base, eh?
I used this technique to add a little drop of high-elf-red-wine to coming out of the bottle/amphora, to show that their homeland is under attack and intense the story of blood is shared at the moment.
When I opened up my Tamyia Clear blue some dry remains feel of its cover and I used them to show some kind of broken glass- or magic-high-elf-crystal pieces on the base. Yeah not very covincing, but I liked that idea. Painted my plinth black and was done with the quick base. About 1,5 hours of work needed.
Like I said, just a very quick base, but I hope you enjoyed the little explanations. Sometimes a quick way is nothing bad.
Keep on happy painting!
Best Wishes
Roman
PS: You can find this High Elf here:
Support us and check out our offers!

Continue reading...
today MV's year of the painter brings you another tutorial, with tons more to follow
This time a rather quick base step by step of the base I did build for the High Elf I painted during private coaching with Roman from Russia.
During the coaching I just painted the figure without an idea about the base yet. I did build a little gaming base during the coaching but gave it to Roman. I showed him how to paint my wet and wet technique to it and primed it again so that he would have space to test it too. He did not finish it so I thought to give it to him as a gift. Long story short: I was in need of a new base and wanted to do a quick one. So I collected some material from my stock that I might use. Important on that point is: You need a basic plan about your base, for example: a forest base, a dwarf mine or imperial town. My idea was to do a little scene in an High Elves temple that was under attack.
A Plinth, some cork, some white plaster parts, some wood pieces from canvas painting, a skull, etc.

Well so far for the inspirational brainstorm. I ended up with glueing together some stairs from the wood pieces on top of some cork.
I went on with adding more. Therefor I had to cut the wood pieces in shape, so I did with the use of my scalpell. The skull was also added. You might recognize the stairs hanging in the air like Michael Jordan to the the back of the base. No problem yet. Will fix that later. It's a quick base, not a super ultra cool base, just a quick one. I also added some damage to the wood pieces as those stairs are planned to be over ninethousand years old and ... well, yeah they got to look old and this also brings in detail I can paint later on.
Some more work was done to to it. I used a white plaster piece to add a little column. Used another white plaster piece to cut wildly to recieve some small debris. As you can see the column piece also recieved some scratches and some more were applied to the stairs. A bottle was added. Sadly I don't remember the company who makes these bottles :/
The gap in the back of the base was filled with cork and debris glued to it.
Chop! Chop!
After priming a quick brushwork delivered a very bright basictone to the base. Dirty, yes - for the moment. Sketching the bottle and the skull too. Plow! Plow!
This bright undertone was well planned. I then used the airbrush to spray several thin layers of blue to it to stain the whole base in a cold moonlight situation. Pft! Pft! Starting from a bright blue first and going darker in about 3~4 steps. Again using the brush I painted a little light situation to the base by using my bright blue again and making it even brighter by adding a little white to it. Concentrating on final edge highlights with mainly pure white.
I did not go dark enough in my oppinions so I took some black/brown pigments to the strongest shadows of the base to make it dusty. Working with pigments on a base, eh?
Base finish with pigments to make it look dusty.
I used this technique to add a little drop of high-elf-red-wine to coming out of the bottle/amphora, to show that their homeland is under attack and intense the story of blood is shared at the moment.
When I opened up my Tamyia Clear blue some dry remains feel of its cover and I used them to show some kind of broken glass- or magic-high-elf-crystal pieces on the base. Yeah not very covincing, but I liked that idea. Painted my plinth black and was done with the quick base. About 1,5 hours of work needed.


Like I said, just a very quick base, but I hope you enjoyed the little explanations. Sometimes a quick way is nothing bad.
Keep on happy painting!
Best Wishes
Roman
PS: You can find this High Elf here:
Support us and check out our offers!

Continue reading...

