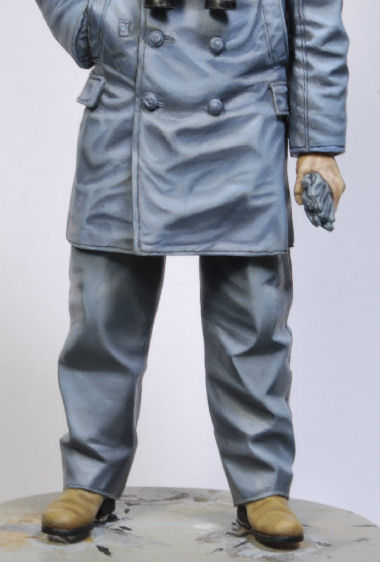
Alpine's 1/16th scale German U-Boat Watch Officer

planetFigure

Help Support planetFigure:

This site may earn a commission from merchant affiliate links, including eBay, Amazon, and others.

Steve Ski

PlanetFigure Supporter
Joined
Jun 9, 2011
Messages
3,689
Location
NE WA, USA
Ok Gents, the bunker has been cranked up to full power and we are in business once again, it's been a long summer.

At the end of last winter I was working on a 3D German U-Boat Gun Deck, Type VIIB made by Shapeways, Sasa Drobac. Taesung Hamms graciously sent me Alpine's 1/16th scale German U-Boat Captain, kit # 16021, and I picked up another Watch Officer figure for that particular dio build.

In this section of the blog I'll be covering Alpine's 1/16th scale German U-Boat Watch Officer, kit #16036, by Taesung Hamms. Now, yall may remember I've already done this figure for Track-link, exclusive build. I paid for this Watch Officer to go with Alpine's 1/16th scale German U-Boat Captain, kit # 16021, which I did not pay for. So, the Watch Officer in this blog and the Captain will appear in the final pics for this particular blog, the Gun Deck. The Captain will "not" be a feature in this blog except for the final pics, that is for Track-Link exclusively. Clear as mud, I know, HA!

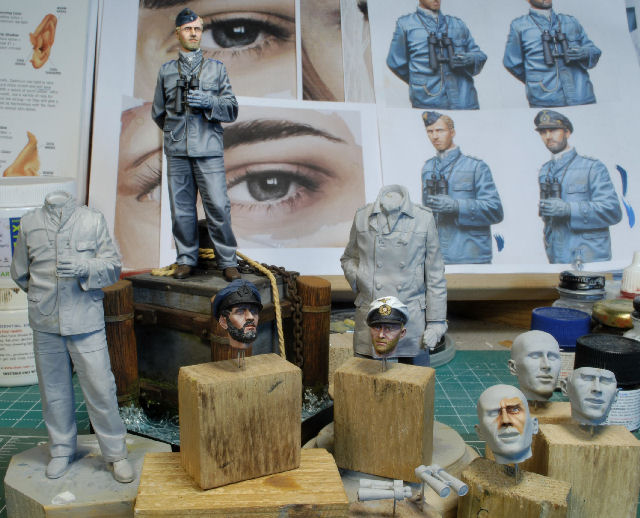
Here we have the motley crew all together.
_DSC2623b-vi.jpg


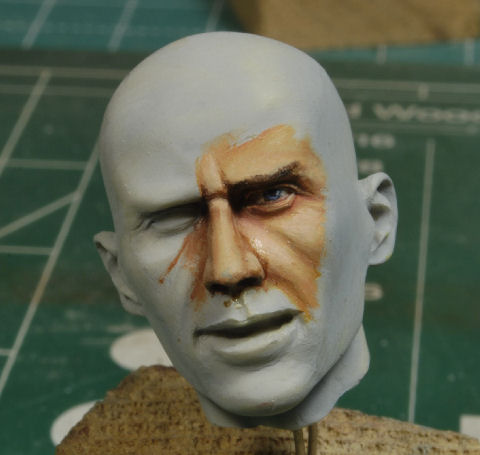
Now, what you did not see, unless you visited my blog on TL, was the method used to paint the face specifically. I ran across a young lady's work on YT showing how she blends oils and starts from a basic grey background and produces some incredible work. So much so that I've used it to paint the Captain's face exclusively, with better than expected results. That partial head painted you see on the right was painted as a test run for this method. The pretty young lady's name is Daria Callie. She's very well known in the portrait community and she has several videos you can use to perfect your techniques. I had to go through the videos once again to get back into the swing of things, so to speak, after a long summer season.

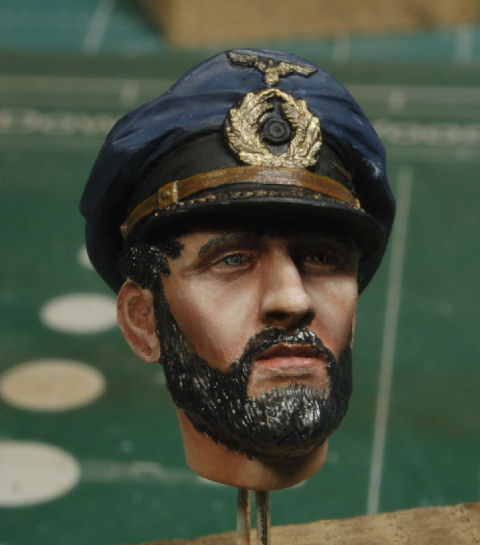
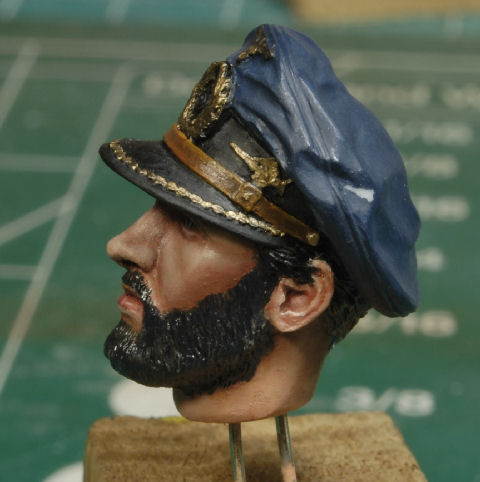
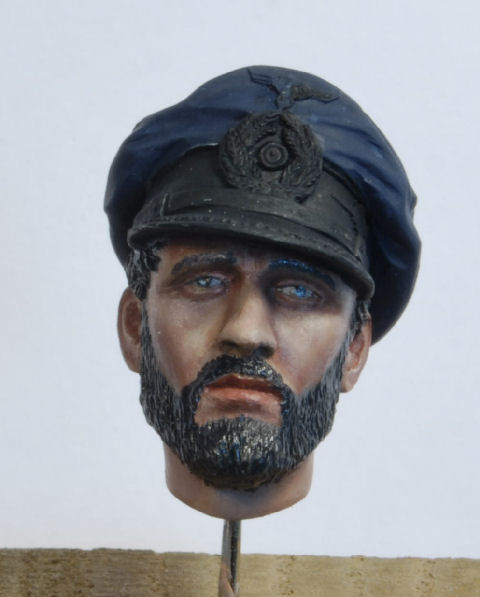
A frontal view showing the flesh tones blended without a base tone. The pics are a bit glossy, but oils will dull after a few days. There's still plenty to work over on this head, but for right now, he's looking pretty good for starters. I painted this head in just over four hours, that's a first! I plan to nail this method down hard, it works too well to just let it get rusty in the ol cabesa.
_DSC2625b-vi.jpg


The eyes will be worked a bit more, plus blending more tones/values into the surrounding upper cheek and below the eyes, etc.
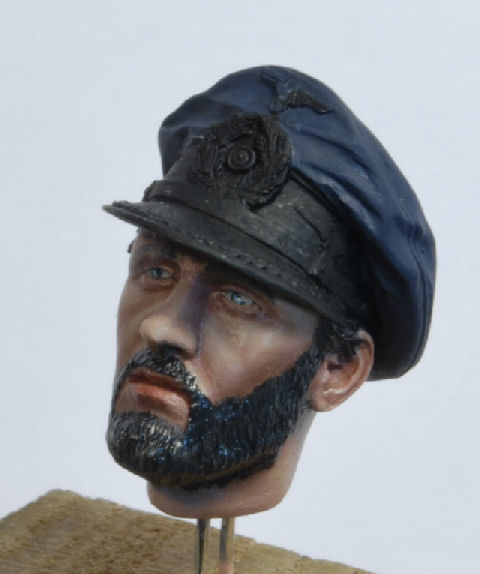
_DSC2626b-vi.jpg


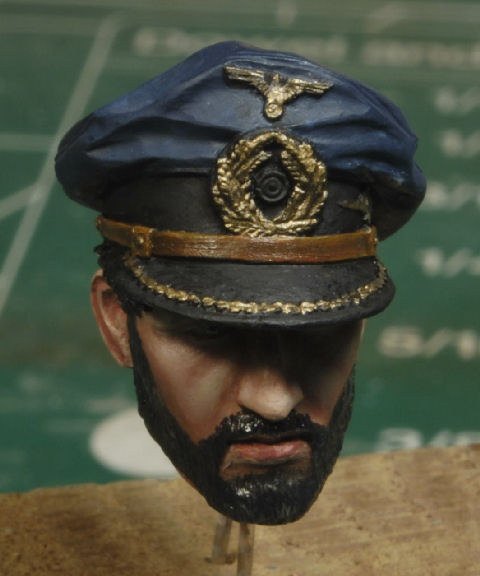
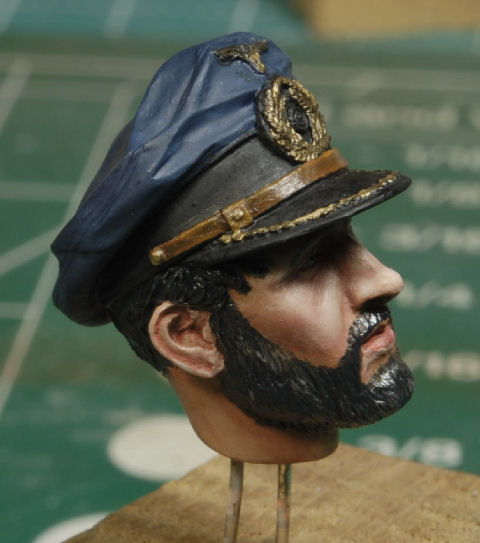
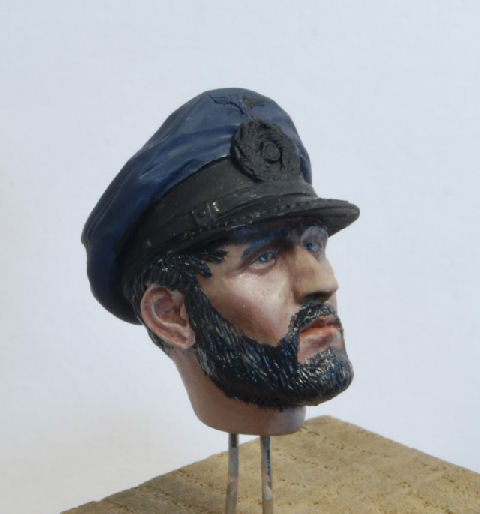
After a few days I will go over the beard to get it dialed in. The lips will be worked a bit more too. As you can see, the gloss from the oils makes it difficult to really see all the detail, but they will become more apparent after the Dull Coat.
_DSC2629b-vi.jpg


At any rate, it's been one heck of a long summer and I'm glad to be back in the bunker. The only thing stopping me now is plowing snow, and that ain't so bad, HA!

Please, if you "see something, say something", I'm not shy to constructive criticism, I'm still learning too.

Thanks for watching, more to follow soon. Cheers, Ski.
 
I realized I never did a "white balance" before taking the last set of pics, oops, my bad.

At any rate, I did some reworking of the eyes, cheeks and lips. While that was drying I used oils for the cap leather strap and worked the gold trim on the elements. In a few days the original layer of oils will be close to dried at which time I'll start adding layers of reddish tones where needed as well as defining the eye lids, etc.

There's still plenty to do, but we are making progress. Hopefully this head will be done in a few days and then it will be uniform time.

Remember "ol one eye"? This was a perfect head to practice on. As you can see this is just a rough draft, but it shows just how easy the techniques described above really works.
A big thanks goes out to Steve Readdie of "Reedees Miniatures" for supplying several different heads.

http://www.reedeesminiatures.co.uk/the-quartermasters/1-9---200mm

_DSC2643b-vi.jpg

_DSC2631b-vi.jpg

_DSC2636b-vi.jpg

_DSC2639b-vi.jpg

_DSC2642b-vi.jpg


More to follow and thanks for watchin. Cheers, Ski.
 
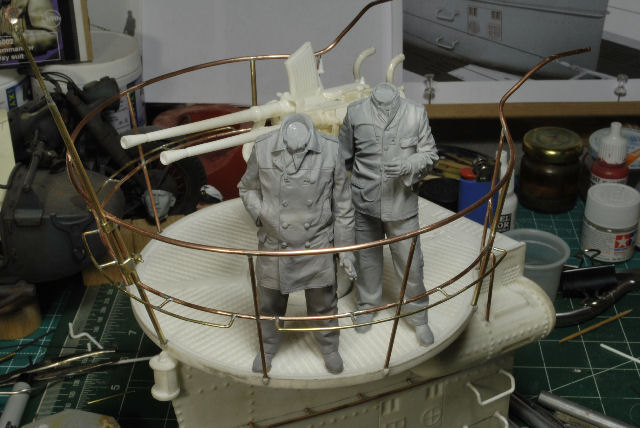
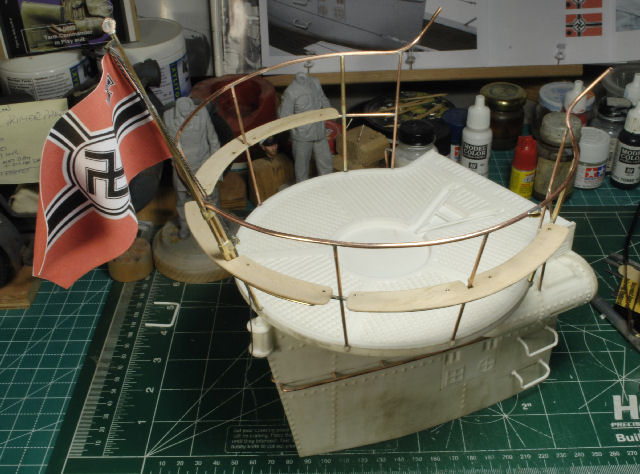
I recon I should post the gun deck that's been in the works for these figs since last winter. I wasn't going to post these pics here, but it gives yall a good prospective for what the scenario is for these figures.

Now, yall know Jeff has produced a killer set of figures for a gun deck as well, and a portion of a deck is included in the set. So, there may be some switch hitting going on down the line for these figs and the set I just ordered from Jeff. I've already had several mention the option.

At any rate, I find myself completely out of my element, thanks to Taesung Hamms, who sent me these figures in the first place. I probably never would have ventured into the mariner arena if it weren't for Taesung stretching my horizons. For that, I thank you T50! These figures are superb and I am enjoying the build. And, it ain't all green in color, HA!

_DSC2572b-vi.jpg


_DSC2592b-vi.jpg


This 3D resin gun deck was picked up from Shapeways, designer Sasa Drobac; https://www.shapeways.com/shops/distefano_3dprint?section=1/16 Scale&s=0
I was intending to do the full Type VIIB deck, but I couldn't justify $942 US to the Mrs. I already owe back rent to the dogs for continual use of the dog house as it is.

So, which ever deck is used for these current figures the other will be used for the second set of figures. Either way, I'm on a seaworthy roll and enjoying the process. Snow fly is coming fast and all the outside work has been completed, so I bunker bound.

Thx for watchin. Cheers, Ski.


A bit more progress has been accomplished. It should be noted here that I gave the head a shot of Dull Coat before starting any of the steps mentioned below so as not to disturb any prior work.

I spent about another four hours reworking the eyes, what a pain in the tuckus. I'm so use to the 200mm figures that just stepping down to 1/16th can be a bit challenging, especially after a long break from the paints. But, once in the groove it started to comply with my wishes, lol.

Ok, I was able to get the ever so slight glint in the eyes and definition around the pupils. I use acrylics for eye work because it dries faster and is easier to control in such a small area. I had to lighten the eye around the pupil a bit and redo the lower lid for definition as well. Touch up around the eyes will also be addressed, such as slight feathering of lighter tones under the eyes, crows feet, etc.

Next up I worked the cap using Ultra Marine Blue, Titanium White, and a touch of Paynes Gray. The recesses were feathered in before adding the highlights. Once the oils were in place I feathered them all together in the appropriate locations. So far so good.

I also added Paynes Gray, Titanium White, and a touch of Ivory Black to highlight the beard, which still has plenty of work needed. When the oils set in a day or so I'll make a filter pass with black and Dark Earth acrylics to work into the recesses of the beard, bring in more definition in that area.

Once these next few steps are completed and the head is in a satisfactory condition I'll move on to the uniforms of both figures. I'm really excited to finally be getting to the jackets and trousers.


_DSC2651b.jpg
_DSC2650b.jpg

_DSC2648b.jpg
_DSC2647b.jpg


More to follow soon and thanks for watchin. Cheers, Ski.

 
Hi Ski

Great to have you back in the bunker and what a great subject to be working on , really impressed by the gun deck a real nice match with the figures .

Thanks for sharing the flesh painting certainly looks really good

Will,you be putting a wash over the cap badges and highlighting again ?

Following this with interest

Nap
 
Thanks Nap, especially for reminding me to wash the cap elements, lol. I added that to the punch list, be done this week.

Thanks for watchin Nap. Cheers, Ski.
 
Eyes are looking much better now, like you I always use acrylic for the eyes and oil for the rest of the face, have tried oils for the eyes but just could not master it well enough.

Cheers
Steve
 
Back to Alpine's 1/16th scale German U-Boat Watch Officer, kit #16036
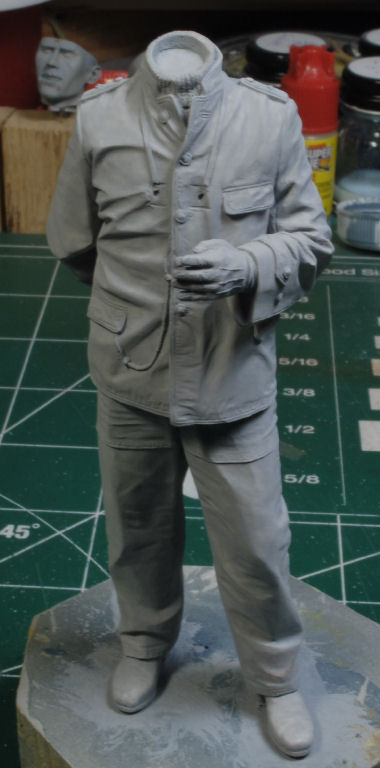
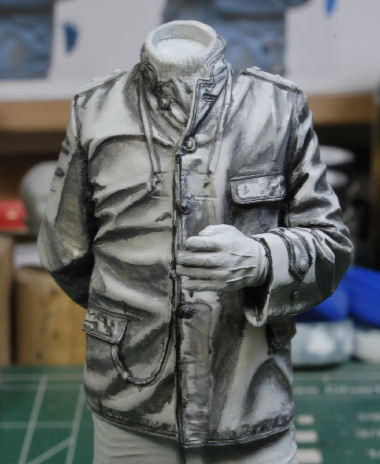
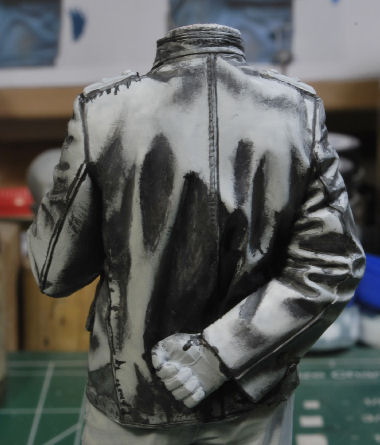
Keeping my method of madness going as before I applied the pre-shade on the upper torso. It may look a bit heavy in some areas, but the gray tones will feather in just fine when I start the process.

_DSC2760b-vi.jpg
_DSC2762b-vi.jpg
_DSC2764b-vi.jpg


The key here is when the oils are applied I keep them within the same tonal range as the Captain figure. If the tones are too far off the figures won't mesh when it comes time to secure them to the gun deck. So, I'll complete the upper torso first, then move onto the legs just like our Captain figure.


Blending the Coat

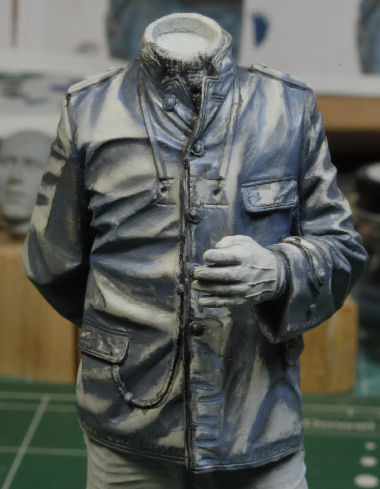
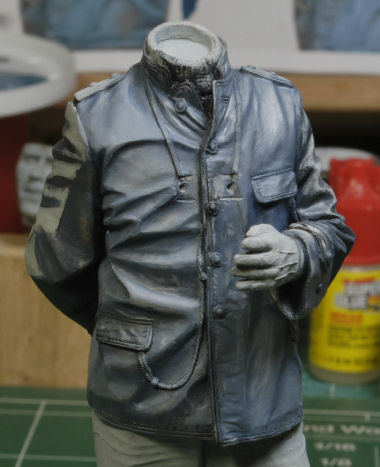
With the color tones laid out as before I began with the darkest shades first placing a small spread in the upper portion of the creases. Then, taking the wider brush I feathered and blended the oils out to the sides and downward. I will continue with this particular tone until the front of the coat has been treated, then do the same on the back of the coat.

After the initial tone is in place I step up a shade lighter and spread just below the prior tone and feather and blend it. As I said, I will continue this same process on the back of the coat as well to insure uniformity with the gray tones. I noticed a slight variation from the front, back, and sleeves on the last figure, so proceeding in this manner will cut down on the variations. Slight variations are not a big deal, it's when you get tone differences that are obvious, then it becomes a problem.

_DSC2779b-vi.jpg
_DSC2781b-vi.jpg
_DSC2784b-vi.jpg


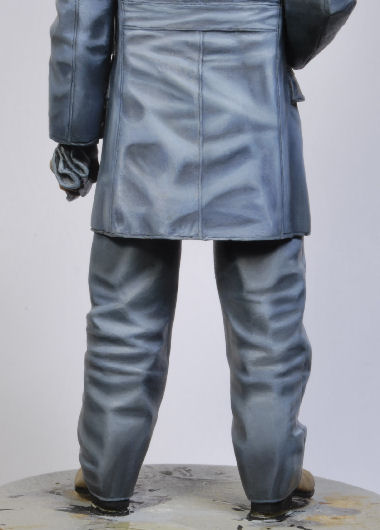
You may not have noticed it, but I did. The tonal difference on the jacket vs. the trousers is more towards the gray, on the trousers, rather than the more bluish tint of the jacket. See the pics below. this really isn't a big deal, they're two separate articles of clothing and should most often have a slight variation. I just don't want to get too far afield with the variations.

_DSC2738b-vi.jpg
_DSC2741b-vi.jpg


More to follow, and thanks for watchin. Cheers, Ski.
 
Hey Ski, they say the best way to eat an elephant is one bite and a time. This is an epic project and one that I too considered before chickening out. Those Alpine figures are truly superb and your painting is helping to bring them to life. I particularly like the updated pic of the face. Apart from shovelling snow, I think you’ve got enough on your plate to keep you busy until summer and beyond. Keep up the great work mate. Ruck on
 
Thanks for the encouraging words Tony, they are greatly appreciated.

I recon when I retire I'll have plenty of time to refine my facial work, etc., ain't quite there yet. But, it's one heck of a fun journey, to say the least. Still haven't figured out how I'll place the gun deck, with or without a water feature. But, I did pick up Jeff Shiu's gun deck set, which will be a good one to tackle, looking forward to it.

Thanks gain Bro, Ski.
 
Looks like you tackled those leathers very nicely mate, good to see you are getting your bunker time in and using it well (y)

Cheers
Steve
 
Back
Top