Changing a Cossack-Bust

planetFigure

Help Support planetFigure:

This site may earn a commission from merchant affiliate links, including eBay, Amazon, and others.
30. Day, 19. November, 2010

Thanks a lot, Mark, Steve, Antonio and Kevin!!!

Today I make the second shoulder piece …:
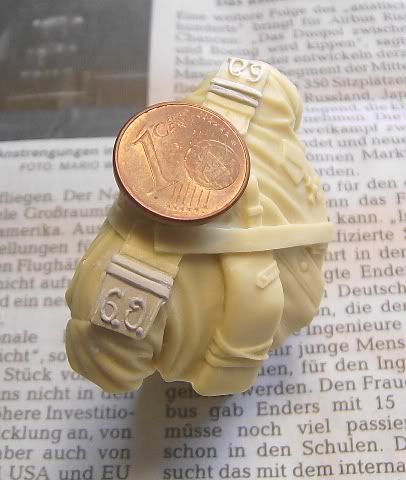
30_1.jpg


Then I have gone in the small points of the yesterday's shoulder piece once more in it. They had been criticised in another forum.

Now it looks better, I think …:
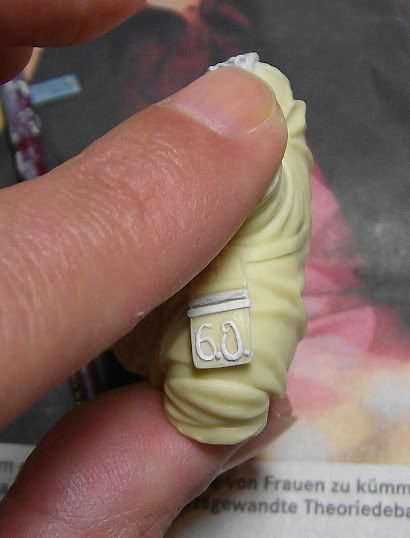
30_3_1.jpg


And, moreover, I would still like to tell You a little bit about the Orenburg Cossack host ("Orenburgskoje Kasatschi Woiska") …:
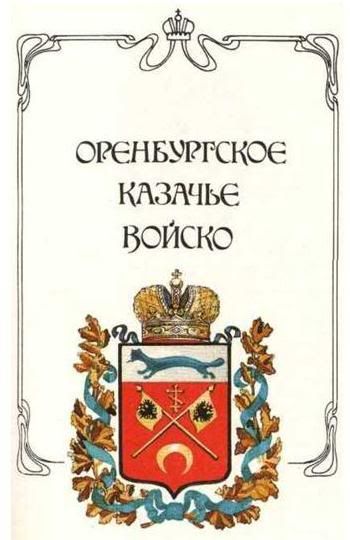
30_3-1.jpg


These Cossacks lived in the Orenburg area in the Ural steppe …:
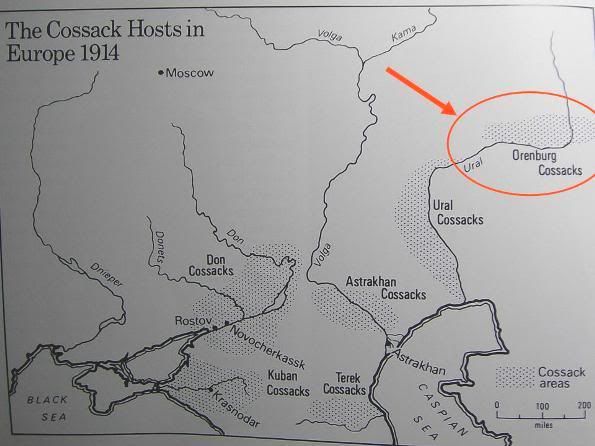
30_4.jpg


The beginnings of the city is a small fortress which had been founded in 1735 in the Urals steppe.

This fortress, "Orsk" was called (after the river Or there) directed against the unexploited area there and the Tartars living beyond the Russian border.

It was a component of the Russian settlement belt, in the Cossack, as well as elsewhere, as military farmers were settled.

By her foundation the fortress had been called first "castle Oren", also after the river, but just with the German ending "Burg" (=Castle”).

Such German names seemed by town foundations in Russia absolutely frequent (for example, Sankt Petersburg, Jakaterinburg etc.)

While the original fortress had to be given up, a new fortress was established in 1743 nearby which was called then again "Orenburg" and is today a capital of the Oblast (area) Orenburg.

Today the town has just 525,000 inhabitants and is only a little smaller than Bremen, my hometown.

The Orenburg cossacks put at times of the last czars one of the smaller ones of eleven Cossack hosts.

In the First World War they moved with 31.623 men and suffered, like other Cossack's units also – considerable losses.

Up to the 2nd of December, 1916 66 officers and 687 team ranks died, 190 officers and in 2863 man were wounded and 22 officers as well as 134 men got in captivity.

After the 2nd of December, 1916 there are on account of the revolution, the chaotic time of the temporary government, the next October revolution and the civil war (till 1922) no more dependable figures.

But because the Orenburger stood by the majority on the part of the restaurativen forces – the "white" – they might have had in the civil war a considerable bloodletting …

Badge colour of the Orenburger Cossacks was light blue.

Here the peace uniform …:
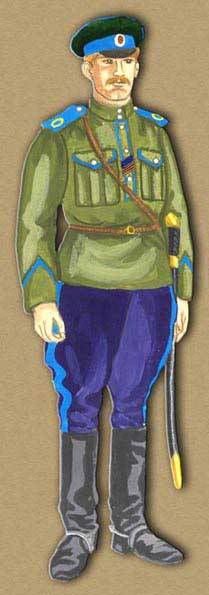
30_5.jpg


… is also carried today again …:

30_6.jpg


However, back to the Orenburger peace uniform:

The cap was deep-blue with light blue cap tape …
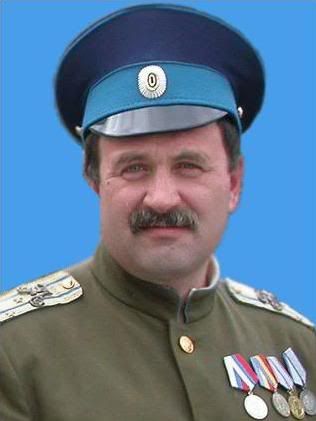
30_7.jpg


… the shoulder pieces were also light blue with silver rank badges and yellow numbers´
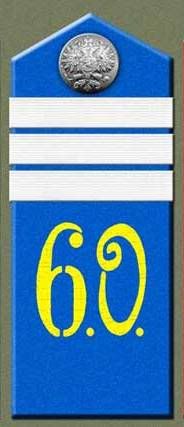
30_8.jpg


The field uniform of the Orenburger saw meanwhile thus from …:
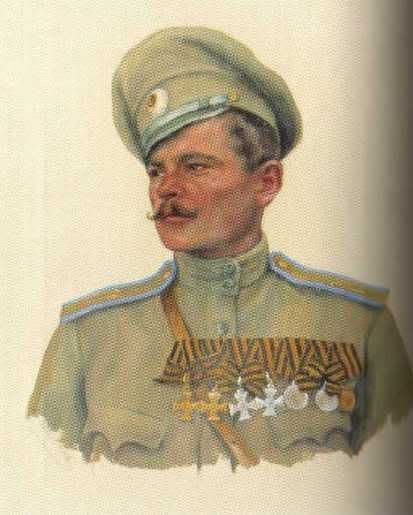
30_9.jpg


The cap was a khaki, the also khaki-coloured epaulets had a light blue edge (or also not!). Rank badges remained silver and the numbers yellow.

What concerns the caps:
To me like neither the quite khaki-coloured, nor the blue / light blue version.

Good for me, because beside these both variations one more mixing variation which is booked also several times was carried:
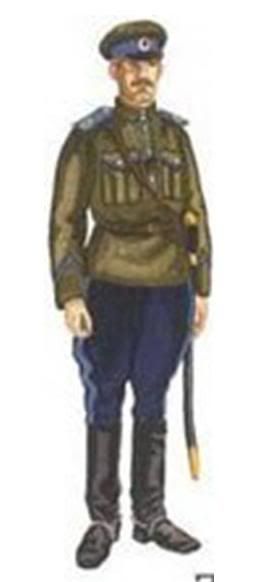
30_10.jpg


There is also this variation today again …:
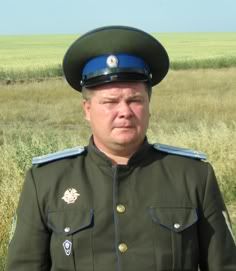
30_11.jpg


With it is decided for me how I will paint my Cossack:

The cap becomes Khaki / light blue ones

The rest will be shown like the regulation-appropriate field uniform.

But first I will model the next week still a little bit …

Till then: Nice week-end!
 
31. Day, 23. November, 2010

This picture …

31_1.jpg


… the last week on the idea has brought me that I could do absolutely still what for the "heroic breast" of my Cossack and give another order to him.

Today I have already made the order-ribbon.

This order ribbon never changed, by the way, his form. This is due to the fact that it only from the front like a real "ribbon" looked …:

31_5.jpg


From the back one sees that the material of the "ribbon" was stuck just on a piece of tin plate fixed (or later glued) …

31_4-1.jpg


This pentagonal form with the overlapping tape was to be made by far more difficult than I first thought.
I have managed her finally, however, quite well, I think …:

31_2.jpg


31_3-1.jpg


To other details of this Saint Georgs order we still come in detail during the painting.

Tomorrow then I make the order cross
 
32. Day, 24. November, 2010

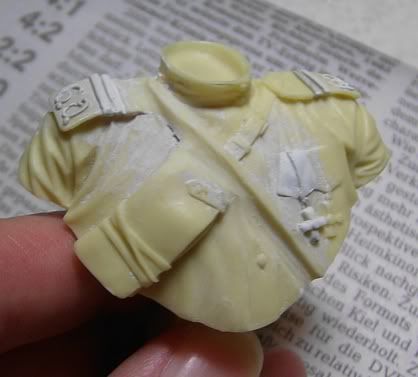
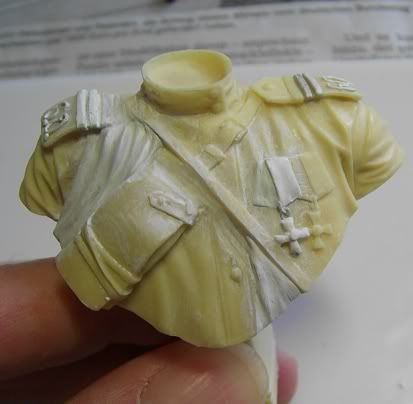
Yesterday I made the order ribbon, today the order itself is it:

First once I determine with ascertained tweezers the outside dimension of the quite available cross …:

32_1.jpg


32_2.jpg


I make the new small cross from FIMO …

32_3.jpg


It required several approaches, until I liked the result. And now the tweezers say me that the measure also fits …:

32_4.jpg


Then the minicross comes to the stove (actually, pure stream waste!) …

32_5.jpg


… and is baked there „hard“.

Another hurdle turns out, which to solve cross afterwards so carefully from the pan liner that it does not jump away and says goodbye in the "carpet nirvana".

However, it worked!

32_6.jpg


Tomorrow then the cross has to go to the heroic breast …
 
Is it an idea to sand it a bit flatter and then polish it Martin ( polishing on a piece of paper will do)?

The outlining of the cross will be even more sharper.

René
 
33. Day, 25. November, 2010

First of all: Thanks a lot, Carl!

Thanks also to you, Réne, but I am glad that I have done something like that small generally!


With second glue …

33_1.jpg


… I have mounted the little cross today …:

33_2.jpg


The tiny ring to fix the cross to the ribbon is from Milliput …:

33_3.jpg


Hmmm, in 1:1 I have been rather contented …

But if now I look the photos here, the cruel macro says me that the top on the cross is not really around, but has the form of an egg and that the cross also hangs a little bit too deeply.

Maybe I go there once more with …

Tomorrow then there is still another detail
 
Servus, Martin!

I'm continuously astounded at your work, and as always, thankful for your demo, it gives me ideas ;)

Prost! Gruss aus Bethlehem an Bremen,
Brad
 
34. Day, 26. November, 2010

Thanks Brad – You're wellcome! Prost zurück!

But now something else …:

Our hero has been carried by me to the Uriadnik (noncommissioned officer) what means that he is armed after the weapon nomenclature of the Russian army now not only with saber and gun, but, in addition, also with a pistol.

The following weapons come to question:

The heavy Mauser pistol, model 1896, a German weapon which was produced before the First World War in licence in Russia …:

34_4.jpg


… or the Russian Moisin-Nagant revolver, model 1895 …:

34_5.jpg


I could dismiss this, because the weapon shall not be seen in the bust anyway.

A small however fine detail causes this, however, nevertheless:

In the piston of the weapons there were rings, in which a song strap or (much more often!) a cord was fastened whose other end of the weapon carriers was tied round the neck.

This should prevent the loss of the weapon.

These cords were tied really only round the neck (ideally for choking!) and could show all possible colours like the following pictures point …:

34_1.jpg


34_2.jpg


34_3-1.jpg


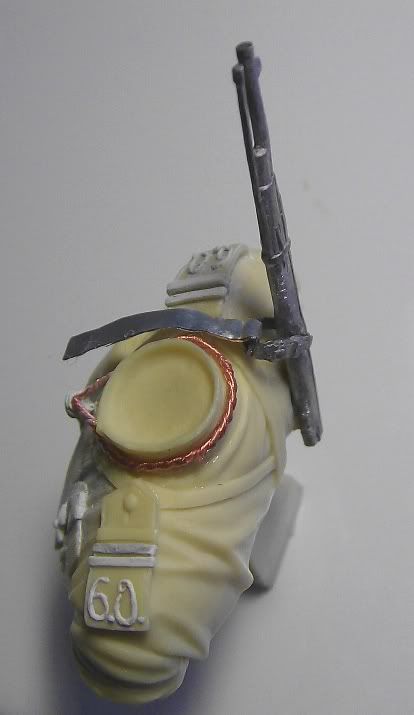
So my Cossack must also get a cord now of course!

In addition I take a customary cable …

34_6.jpg


… and peels the plastic coat carefully from …:

34_7.jpg


Then I take two copper veins of the cable …

34_8.jpg


… one end fastens in the drill chuck of my "Proxxon" …

34_9.jpg


… during me the other – loose – end firmly with the tongs packs.

Theb the drill briefly let go with slow speed and pull apart both cable ends, besides, very firmly.

At the end one has a nice cord whose thickness fits to scale on the hair!

Now this cord is fastened with second glue bit by bit to the figure …:

34_10.jpg


34_11.jpg


34_12.jpg


To the locking thing I go – just as in the order - but the next week once more come on. I do not like this thus yet!

But now first of all: Nice week-end and the nice 1st Advent!
 
Hello my friend.
Its an easier way to take a copy from the cross.
Take MS give it grease before and then press it onto the cross.
Put it up let it harden, then take the copy with ms into the mould.
My english is not so good, hope you understand that.

Neverless, your historical research seems to me like perfect.
And I like your achievement on one, recall it, one piece.

On my bench there are several pieces which want to be finished.

Keep us updated, I like your work,
and
specially your perfect presentation.
Thanks for that.
 
Hi Stephan!

I thank you very much, old mate!

I think, with historical figures research, construction, sculpting, painting and history simply belong together.

A good mixture of all puts out together the fun which I have with this hobby.

And..: Clear I will continue!

What concerns the production suggested by you of the cross:

Good tip, but I have tried this years ago so similarly with a roman Gladius.

Has gone frightfully "to the trousers"...


Many greetings
 
35. Day, 29. November, 2010

The new week begins with one correction day …

I have made the locking piece of the gun cord once again new.

And because I was before already in correcting, the small order from FIMO still originated sometimes anew – and a little bit more filigree! And now the order sign in the middle of the cross is round, not more egg-shaped.

I also think, now the order better sits.

Finally, I have cut the end surviving still below of the gun cord still suitably.

Besides, provision was made, that to itself the copper cable with the abscission not aufribbelt what would not look nice.

Only the bottom with liquid second glue was "watered".

After the glue was hard, I have the ends with the mini-buzzsaw …

35_1.jpg


… separated. The single kable-cords are "welded" by the glue and the originating heat with the saw to a firm rope together which cannot fray now any more.

Now thus this sees from …:

35_3.jpg


35_2.jpg


And now I am also ready with the upper part of the body of my bust.

Then the next days will belong to the gun …
 
Looks tremendously well Martin!


but please be very careful with this round little saw.

this tool, inviting to saw little parts hold in one hand and the dremel in the other can cause serious injury.

Once I tried to get through a piece of resin and the saw suddenly bited into it.
It was projected and missed my eye but you can imagine what happens when this tool gets out of control.
Better secure the object to your table so both hands are available.

I feel I need to tell you ( looking at the folded blade), I was just lucky that time...

René
 
36. Day, 30. November, 2010

Thanks for Your warning, Réne!

I wear basically protective glasses if I use microns "Proxxon".

And now to the gun:

As one sees, the small gun shows many irritating downpour burrs. Moreover, the downpour is very coarse itself and looks anyhow friable.

36_1.jpg


There a lot of loops and scraping off are announced relatively what I make with a scalpel, mine "proxxon" and sandpaper.

Here an interstate:

36_3.jpg


Moreover, the treatment develops to the puzzle because the "metal" is so soft that it bends with the slightest pressure.
 
38. Tag, 2. Dezember 2011

T today it is the connection strap, which was with in the packet.

Finding of quality: Forget it!

38_1.jpg


I try, at least the strap buckle …

38_4.jpg


to save … and makes the other strap from foil of lead:

38_2-1.jpg


38_3.jpg


38_5.jpg


Completely in the end the whole is already prebent …

38_5.jpg
 
39. Day, 3. December, 2010

The gun strap was fastened to the Moisin Nagant carbine for the cavalry extremely unusual.

He was fastened not under the shaft, but was threaded almost through the shaft by a hole to improve the comfort.

39_1.jpg


My work today is fastening the gun strap so appropriate. In addition the "metal" - strap buckle must be bent around.

But the history of the gun develops more and more to a NIGHTMARE!

Although I have warmed up the "metal" of the strap about a candle, you have with the part exactly ONE attempt to the fitting – afterwards KRACKS!

Rather "Kracks", not the quietest noise, the thing simply does crumble apart!

The dung has broken to me in four pieces, until I could fasten it fairly appropriate for model. Sees of course accordingly from …:

39_2.jpg


I COULD LASH OUT ON IT!

So – now I wikk decide on the week-end how it goes on …
 
40. Day, 6. December, 2010

Then sometime on the past week-end I was so far that I have said myself: „Now there you can amend, so much you want, you will be never contented with it!“

And after my experience this discontent feeling disappears not with the time, but it increases rather still.

So I have decided:

EVERYTHING MAKE NEW!

Gun again from, strap stuff again from, cord again from.

And because every end is also always a beginning, I have begun to drag the gun strap more thinly and to transform thus into a saber strap.

Clear there are by the sanding also "collateral damages" like one sees …:

40_1.jpg


Now so a lot of new construction expenditure approaches me first of all!

But still better, than to let this so …
 
41. Day, 7. December, 2010

Today the reconstruction begins.

I have made drapery in the shoulder new – and have started below in the shirt restoring …:

41_1.jpg


The folds in the shoulder looks too "sharp" to me still a little bit and too in parallel.

If the cartridge pocket is restored, the drapery is reworked in the shoulder once more.
 
Back
Top