roadking
A Fixture
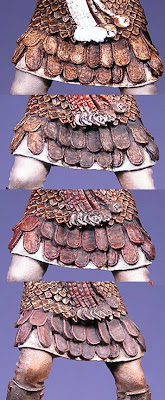
 I have been slow in posting because I had a desire to get further along while taking progress shots that could be cropped and assembled together to show detailed steps in the painting process. This post is just such a montage and hopefully with the images so close to one another, it will be useful and informative to some. Let's focus on the leather armor first: My leather work started with a mixture of approx. half and half Burnt Umber and Mars Brown. Once dry I applied a shadow glaze of Van Dyke Brown and Mars Black around the edges of the leather flaps and up under the scale armor. This was allowed to dry and a wash of the same shadow color applied overall with a bit more black than brown in the mix. The effect of this is seen in the second frame of the group. My next step was to use straight Mars Brown on the raised edges and tops of creases/folds (third frame). First I tried using Burnt Sienna but W&N's paint is far too transparent to give me the effect I was looking for. The last step was to use a mixture of a bit of Yellow Ochre and Mars Brown mixed into Titanium White to replicate the worn edges of the pteruges and creases. Additionally the scale armor has been worked with pale gold printer's inks on the edges to pop out the details.
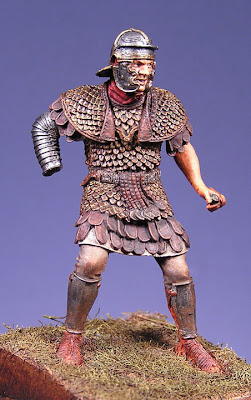
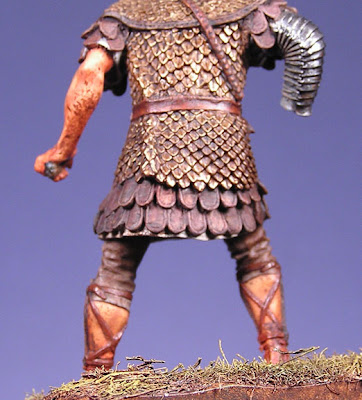
 These two pictures show where the figure stands currently. I have added some color to the grasses with Greenish Umber and Yellow Ochre. This figure should be filthy from the campaign and the elements so I have begun to dirty him up. I initially stippled areas of the figure with a "muddy" mix of all the browns that were on my pallet paper. This was followed by dipping a stiff brush in thinner, making a thinned slurry of the mud mix and splattering the figure by drawing my thumb over the inverted brush over the lower extremities and allowing to dry. This process can be mentally frustrating after spending so much time painting all those details but the end results are worth it. After I glue the sword hand on I will use the same technique to get some blood splatters on the sword hand and armor.
Now I begin painting the shield details, sword, scabbard and belt details. Stay tuned.
More...
