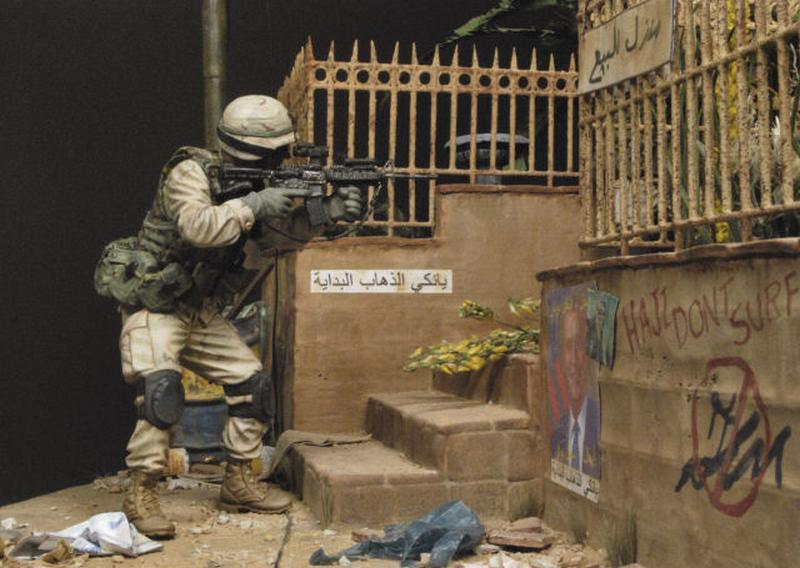
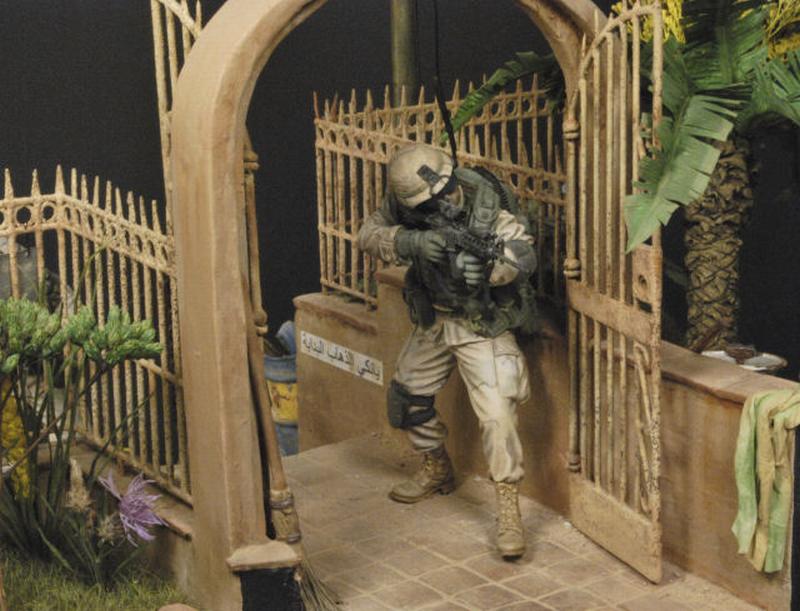
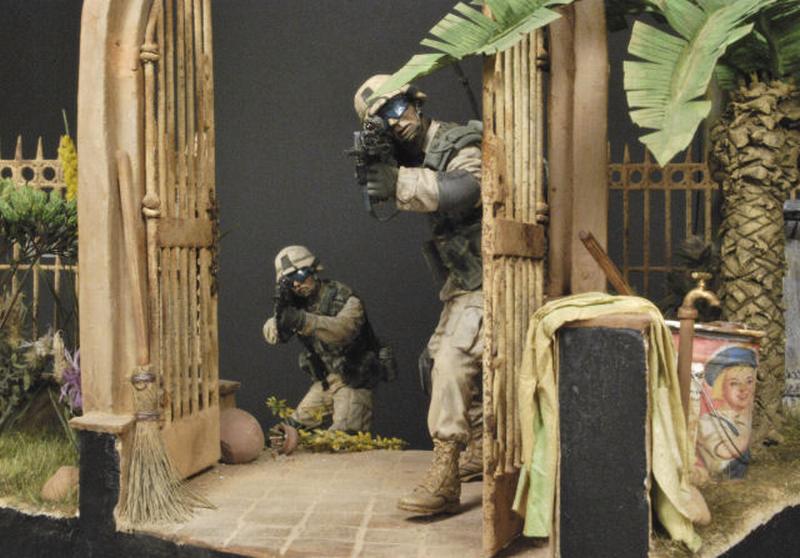
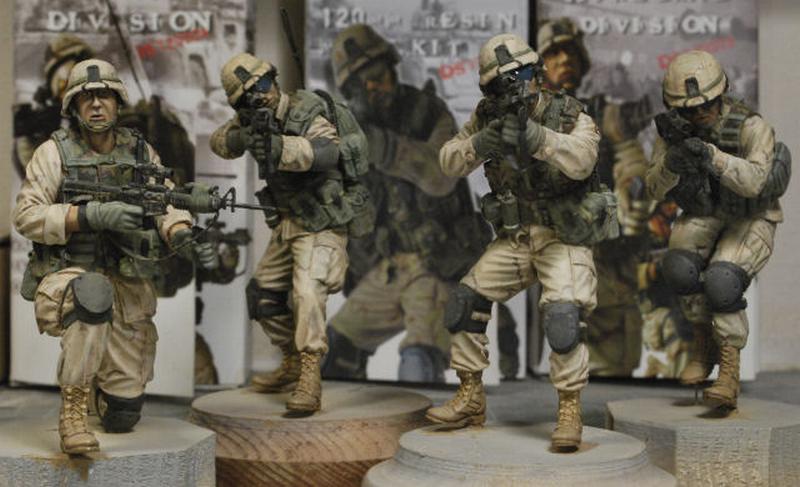
WIP Afghan dio, 10th Mtn Div, 120mm Deyun figures

planetFigure

Help Support planetFigure:

This site may earn a commission from merchant affiliate links, including eBay, Amazon, and others.

Steve Ski

A Fixture
Joined
Jun 9, 2011
Messages
3,687
Location
NE WA, USA
Hi Guys,

This is my first time posting in VBench, so here goes. This dio has been in the works for some time when I finally came across PlanetFigure, so sorry for the late posting.

I was given these four Deyun figures by Paul Owen, owner of Track-Link, and decided to do a paint blog for the guys who may have needed a starting point, but this turned into a full blown dio build blog too. I'm rapping up the last figure now, however this guy needed some serious surgery in the process of the build, that can be seen at http://www.track-link.net/forum/modelling_figures/4549. The thread is way too long to go into, so I'll just added a few pics up to this point and will continue from there on the figure work. If yall see anything that may have been missed please fire away, got great tips from the guys at TimeLines too. And, I'm an oiler at heart so no offense to the acrylic addicts, just what works best for me.

Thx for watching, Ski.

Figure #1
attachment.php


Figure #2
attachment.php


Camo pattern reworked #1, #2
_DSC1525a.jpg


Figure #3, a round has been added to the magazine as previously suggested.
_DSC1546.JPG


Figure #4 to date
_DSC1597.JPG


There were many issues to correct on #4, the infamous "Baby Huey" (Big Head), but most have been taken care of. The boots, goggles, collar, bottom of trousers (butt seam lines) and knee pads. Not a major problem, but annoying.

Sneak peak of the dio layout,
attachment.php


_DSC1488-vi.jpg


_DSC1472Copy-vi.jpg


_DSC1474Copy-vi.jpg


Many of the techniques used for the ground work and base are in common usage today and some in particular were learned from some of the stellar artists who post on Mig's forum, i.e., rusty gate and fencing, trash and garbage dispersal, barrel making and painting (hair spray and salt method) plus dusting, etc. I've tried to use all my talent learned over the years for this dio. Kinda like an example of where I'm at now vs where I came from, timeline if you will, of my current skills. Still got a lot to learn!

I'm hoping to wrap this up before the one year mark in July, we'll see. Research was vague on the locations of this unit, but they did do urban operations within Kandahar from what I understand. Given the lack of any actual photos I will chalk this up as artistic license and call it good. I usually am a stickler for historical accuracy, but these figures can only be used so many ways and getting them all to work in one dio was a pain to plan and layout, hence the angled base layout and no real front to the subject.

All comments are welcome and thx again for taking the time to look. There's some outrageously impressive talent that hangs out here, so I'm all ears and willing to learn whatever you have to offer guys. Please don't be shy!


Cheers, Ski.
 
Veru impressive. I'm suprised we don't see more of these Deyun figures.
Where did you get the railings and gate?
Carl.
 
Hi Carl, Thx for the compliment.

Deyun has some decent figures, but one of the three (#4) was a different sculptor and that made for some surgery in the field. The first three are very well sculpted and have great detail. The latter, Baby Huey, I was not too impressed but he fit the bill with some work . The gate and fences were scratch built, soldered and cleaned up. Took over a week or so to get them done, but it was a fun process. Thx again for watching Carl.


Cheers, Ski.
 

Attachments

  • _DSC1296.JPG
    _DSC1296.JPG
    178.5 KB
WOW, you are off to a great start. The painting of the figures are awesome.The scene is very fluid, and looks very natural, from the poses, to the setting.Excellent start
 
Very impresive painting. When I see painting like this done in oil; it makes me want to stick with oils, and second guess about going over to acrylics.

The camo on the flack jackets is painted very well---it's nice to see results like this done in oils.
 
Thx Guys, glad you like it, sure is a fun build. This is a first for several techniques, so I'm happy with the results. First time for using foam, instead of plaster blocks, hair spray and salt method, making a barrel that looks real, trash that is convincing, and even air clay for tiles on the deck and wall caps.

The flack jacket and uniform camo patterns were initially laid in acrylics, so sorry if I misled anyone. All the weathering of the uniforms and flesh tones, packs, gear, etc., are done in oils. I had done camo in oils before, but not an easy process and too long to dry for required outlines, etc.

I'll give you a nudge Marius, oils are where it's at for me. IMHO acrylics have a particular look, but not real enough for me. And that would be another form I'd have to learn and since oils work so well for me, I'm stickin to it. The blending instead of glazing is what I'm talking about, just too easy with oils to make it smooth and real. And I have given pieces an Oven Cleaner bath before and started over. I really like the properties of oils. Nuff said on that.

Thx again guys and I'll update as #4 get's finished and mount all the guys.


Cheers, Ski.
 
Ski - Firstly - mindblowing dio, really nice. Secondly, forgive my ignorance but could you expand a little on your oil weathering process? Is it akin to dry brushing or more involved? So far my only experience with oils has been wet on wet blending for skin tones or washes. Your technique appears to be subtler where the underlying colours shine through the translucent oils. Love to get some tips so I can start experimenting.

Cheers, kempie
 
Hi Chris, are you refering to the uniform or skin tones? Sorry for asking, just not clear on your question.

Standing by. Cheers, Ski.
 
Roger that Kempie, now I got ya. Since the uniform is so light in color and I wanted a faded look as if these guys have been wearing them for some time I took a bit different approach than normal. I used Burnt Umber for the shadows and Titanium White for the highlights.

For the shadows I used just a slight dab of BU, barely any at all (very thinned paint) in all the folds, etc. Then I came back right after with a clean brush and thinner (just damp) and spread the paint toward the desired direction. I was drawing it outward and the further from the fold the lighter the affect became giving me exactly what I was looking for. It’s easy to overdo this so I took my time, heck I’m a slow painter anyway.

For the highlights I used the dot method with TW on all the appropriate ridges and high points. Then using a clean damp brush I began to blend the TW along the high points. For a more worn look I added a few more dots of TW again until it began to look like a faded and worn uniform. I let the figure set for a few days and came back for touch up. Any points from there on, shadow or highlight, were touched up with light “transparent and feathered coats” to bring the color into range.

I’ve overdone light uniforms before so I guess the point of my exercise was to use barely any paint to avoid overdoing the affect. I had to walk away a few times before it got away from me. Came back later and back in business.

I know it was long winded, but I hope that helps you Kempie, and thanks for asking.

Cheers, Ski.
 
Thanks, Ski - I've got a couple of figs wearing the 3 colour DCU on the bench at the moment. Will be fun to play with this new technique. If you don't mind, I have a few more related questions?

Does your technique rely on a particular finish for the base coat - ie matt, satin or gloss?

Did you use the same colours (titanium white and umber) for the woodland pattern on the body armour and the packs and other gear? Would you use the same colours on even darker patterns (or darker single colour uniforms).

Cheers, kempie
 
No problem on the questions Kempie, glad to help if I can. The base coat is acrylic, Tamiya Buff and then ?? (I'll have to go back and look at the other colors), get back with you this afternoon.

I always use an acrylic base and oils over that. I just followed the basic BDU camo pattern and tried not to over do it, I've done that before as well. Then with the oils I was able to create the appearance seen by using very small amounts of oils to keep from washing out the pattern, transparancy. The TW really helped make this happen by gradually adding where needed. The knees and elbows and so on required more applications, but tempered to keep from overdoing it. Give it a go and post some pics and I'd be glad to work you thru it if need be.

You can send me a private message too, and I'm sure there are many others on this site who may be able to add to this. There’s some phenomenal work I've seen here, which is why I'm hear to learn too.


Hope that helps Kempie. Cheers, Ski.
 
No worries mate, no highjackin here. It's called helpin a Brother out. Let me know how it goes. Thx Kempie.

Thx Pipe, still workin it.

Cheers, Ski.
 
Update, 7/26/2011

Ok Guys, after a long work break I got a chance to finish up Baby Huey (figure #4) and felt there was something still missing from the dio, so I added a bird for the bird bath. Yall can name it cause I have no idea what the heck it is, but after 6hrs of tinkering this is what I've come up with so far. Maybe an Afghani Vulture?? 8O Still need to finish painting the beak and add a few touches, but it’s close to being done. I raided my wife's craft box for a bag of feathers and glued them to a bird formed blob of Tamiya putty. Not bad I recon for an amateur sculptor, HA!

I need a few days to go over Baby Huey to make sure I haven’t missed anything and then work over the punch list for the base and close this puppy out after the 1yr mark. So, if yall see anything I may have missed please feel free to mention it, on Baby Huey, that is.


picture.php


picture.php


picture.php


I cut a pasted a copy of the 10th Mountain subdued patch onto a Word doc and shrunk it down to the size needed, as well as the CamelBak logo for his hydration pack,(lettering only). I don't have the fancy decal paper yet, so it'll have to do for now.

picture.php


picture.php


picture.php


Thx for watchin Guys. Cheers, Ski.
icon_mrgreen.gif


P.S. Sorry my photos are still a bit grainy, but I'm still not sure of the exact setting which will not show that after cropping, etc. Any ideas?? I'm open to suggestions.
 
Back
Top