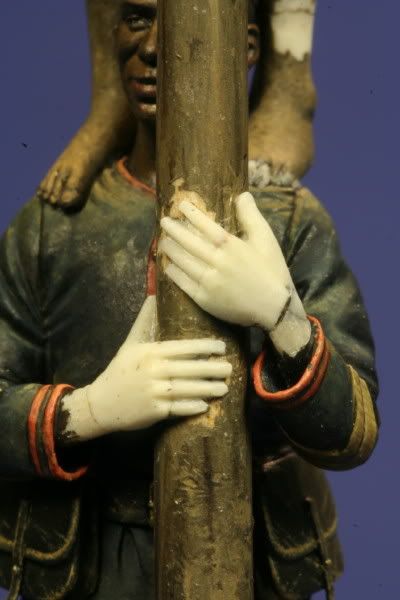
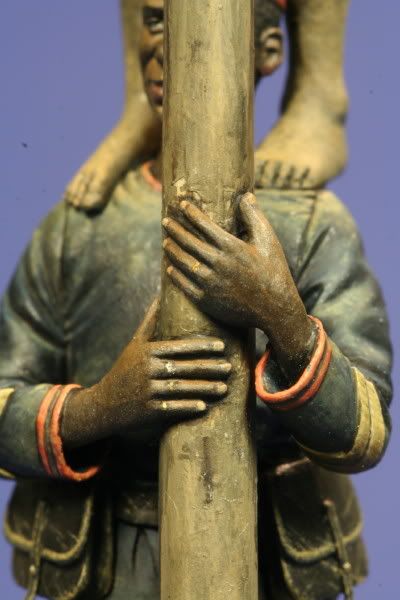
"On the watchout for Von Lettow-Vorbeck"

planetFigure

Help Support planetFigure:

This site may earn a commission from merchant affiliate links, including eBay, Amazon, and others.
Thanks a lot guys!!!

Kenneth: :lol: :lol: :lol:

Gary, I think you are absolutely right about the importance of the "why". It is very important not to use certain techniques because "it is supposed to be done like that", but because you consciencely have a very good reason doing it that way. And as an ultimate goal, I find "making the figure as expressive as possible" always the best one, and more important than just estaethically making the figure look good.

Cheers!

Marijn
 
Doing amazingly interesting as always my friend. I am watching this step by step. I really love the idea and the execution so much !!!!!!!
I hope u come in Athens in MAy and bring it over
 
road to the best of show...
marijn, you really is the new master of model-maker

Best Regards from Spain...

Samuel.
 
Thanks a lot guys! Your nice comments are really motivating me.

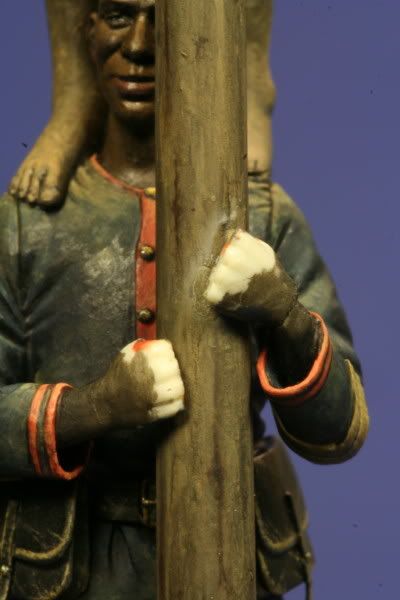
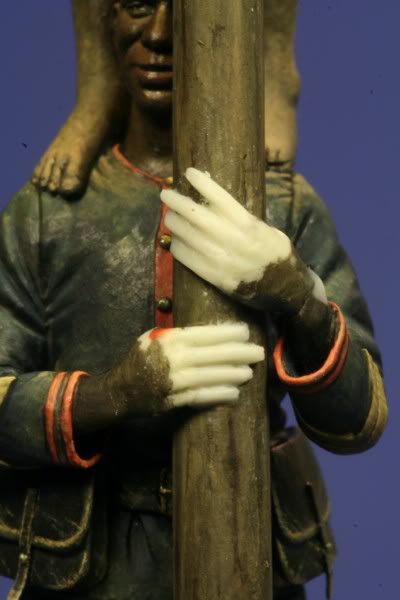
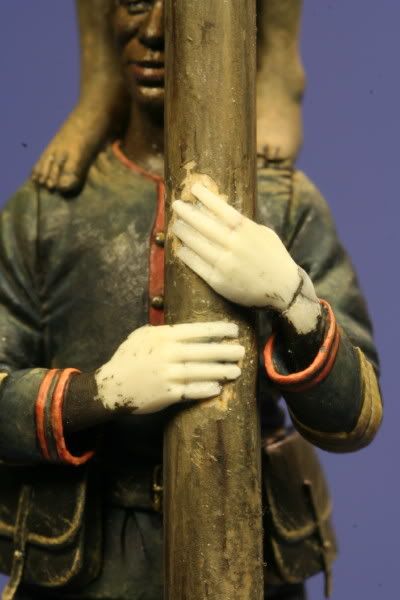
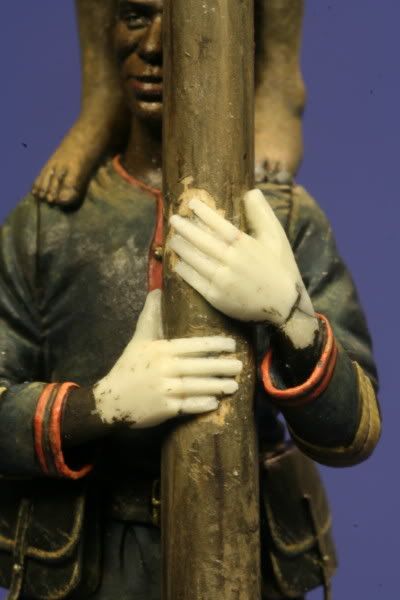
Another sbs, this time of the hands. Because three of them are holding on the wooden pole, I could only sculpt them after painting most of the figures and attaching them to the pole, if I wanted them to make proper contact.

This is how they looked like when just attached to the pole:
afr59.jpg


I added four fingers with magic sculp, gave them ther basic shape, but still oversized:
afr61.jpg


Refining the fingers with n°11 and n°15 scalpels:
afr60.jpg


Adding the basic, oversized thumb:
afr62.jpg


Refining the thumb after hardenin with a scalpel, finishing of the hands. Gaps with the arms were filled with magic sculpt or superglue (if the crack is very thin and deep):
afr63.jpg


And painted:
afr64.jpg
 
And the same procedure for the upper guys' left hand:

after attachment:
afr65.jpg


four oversized fingers added:
afr66.jpg


fingers reworked after hardening, thumb added and refined:
afr67.jpg


and painted:
afr68.jpg
 
At the same time, I also attached the feet firmly to the base. The wooden decking caused a slight gap under them which needed filling. It might make the feet look a little thick, but it certainly beats floating feet! :lol: Too often, one sees figures standing too much "on top" of their groundwork...

Before filling:
afr69.jpg


Gaps filled with magic sculpt:
afr70.jpg


The feet will be painted together with the rest of the groundwork.
 
Thanks Marc!

It is indeed not too difficult, and there is one thing even more important: since you are scratchbuilding it anyway, there is nothing that cannot be repaired or no mistake that cannot be changed!

To prove this, I have the following sbs:

When I attached the figures to the base, I had to apply some pressure to glue the hands of he bottom guy to the pole. This apparently caused the left foot of the upper guy to crack from the shoulders of the lower figure, leaving half of his toes on those shoulders! :( In addition to this, the leg also cracked were the historex feet (that I used as a base for resculpting) met the rest of the leg.

The solution was simple: fill the gaps, and recarve the detail...

This is just the place were you want your figure to crack, no?:
afr71.jpg


the crack at the toes and bottom of the foot was filled with MS, and the toes recarved after hardening. The thin gap in the leg was filled with superglue:
afr72.jpg


And the damaged areas were repainted:
afr73.jpg


You see, for every problem, there is a solution!
Wish I didn't need those solutions, though... :)

Best wishes,

Marijn
 
WELL DONE,Marijn (y) (y) !!!! Your SBS on how the hands were sculpted is VERY INFORMATIVE to the rest of us on the "planet". Cheers !
Kenneth :lol: .
 
And to finish todays posting of: a pic of the vignette after last weekend:

afr74.jpg


Only the groundwork, together with the bucket and brush, and some small retouches, need to be done.

This one should get finished in a couple of days time. So Marc, by christmas, I hope to be well into the next project! :lol:

Best wishes!

Marijn
 
Excellent stuff Marijin! Truly inspirational!

How do you hold your painted piece when you worked on the hands and fixed the foot on the shoulder? Seems it would be hard not to mess with the allready painted areas?
 
Thanks Anders!

You are right, this was also my main concern...

Luckilly, the pole provided enough support for a finger to rest on, so I could work precisely on the hands. The pole was largely painted before attachment of the figures because of inaccessability of the rear parts afterwards, but the areas around the hands and the spots were my fingers rested (and rubbed of the paint), need to be repainted, together with finishing touches to the entire pole. Because now, I don't have anything anymore to rest my fingers, it is more difficult to work precisely, but the painting of the wood is luckily more forgiving than the sculpting of hands... :)

You can see that part of the hands was painted before the rest was sculpted. This was just a basecoat to give me better of the balance witht the sleeves during painting, but the entire wrist area was repainted together with the hands.

Of the decking, only the area directly around the feet was painted. The filling under the feet didn't cause too much damage to this, so it is just a matter of small retouches now. The rest of the decking is being painted only now, so after the work on hands and feet was finished.

All simple enough, but it does take some carefull planning ahead...

Best wishes,

Marijn
 
Thanks Marijn!

I was thinking it would be hard! But it worked out real well thats for sure. Looking forward to the next project, Im sure it will be another stunner!

Keep it up!
 
Simply AWESOME............I have really enjoyed your sbs Marjin. Excellent work and thanks for posting it.
 
Marijn, Thank you for taking the time to put this sbs together. Maybe the staff could assemble the sbs into an article (hint hint). I can't wait to see it finished.~Gary
 
Back
Top