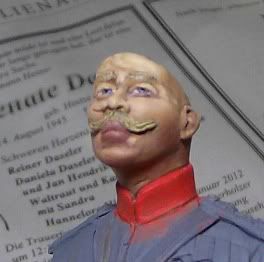
WIP Painting Andy's Cossack Bust (AC Models, 1:12)

planetFigure

Help Support planetFigure:

This site may earn a commission from merchant affiliate links, including eBay, Amazon, and others.
27. Day, 6. January, 2012

Today it is again Red!

I begin to paint the shirt of my Cossack.

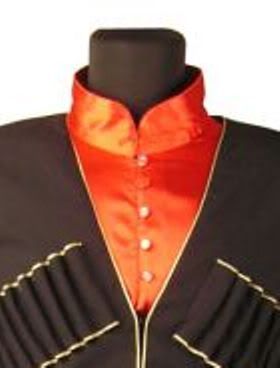
Lets have, first of all, a look at this garment:

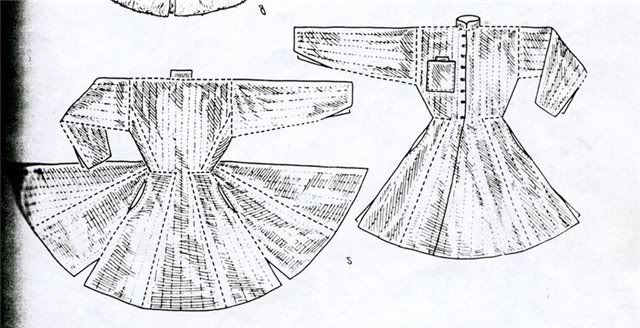
This shirt is of circassian-tatarian origin and is called in the Caucasus "Beshmet".

It is carried about the trousers and is enough to possibly to the knees of the bearer …:

Foto27_1.jpg


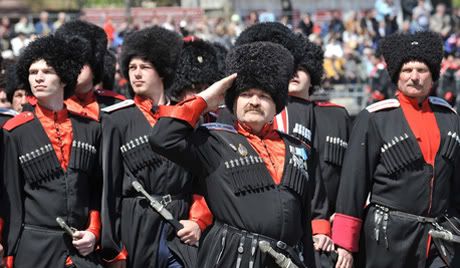
With the Kuban Cossacks it was and is red, with the Terek Cossacks it is light blue …:

Foto27_6.jpg


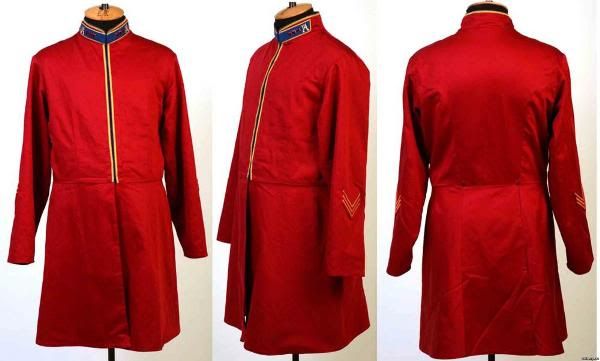
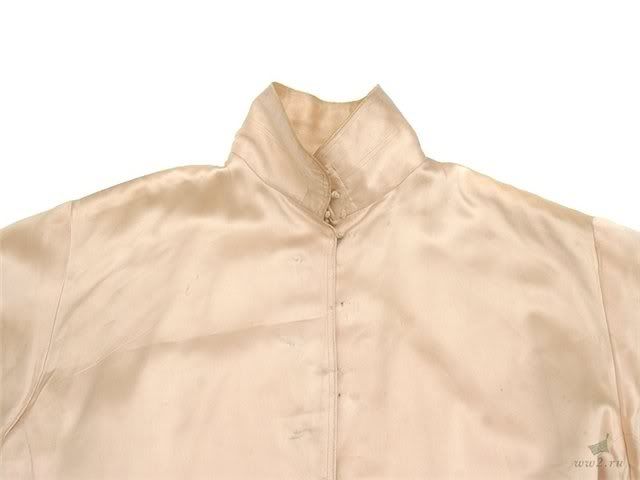
Here we have the Original "Beshmet" of a Kuban-Cossack of the former Red Army with the rank badges of a first sergeant…:

Foto27_2.jpg


… which were carried in the time between middle of the 30s till the beginning of 1943 …:

Foto27_3.jpg


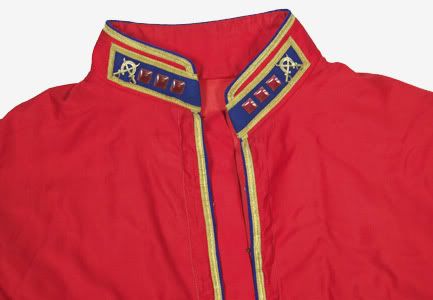
During them - differently high ones! - Standing collar to all "Beshmet" shirts was common, gave it with the buttons different implementation, sometimes with concealed button strip like on the photos on top and sometimes with visible buttons, how in this picture:

Foto27_4.jpg


On the next photo both variations are to be seen …:

Foto27_5.jpg


Importantly is present that it concerns not customary buttons, but small ball-like buttons, the different colours and materials – according to availability and predilections of the shirt owner! - could show (and are able!).

Here a photo cutting…:

Beshmet_4.jpg


Because it concerns another nice detail, I had suggested Andy to show the variation with buttons.

Today I begin to paint the collar.

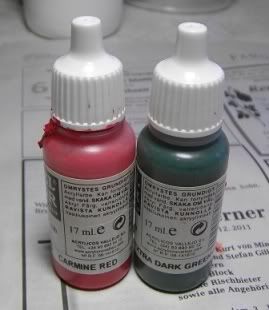
In addition there is first of all a priming coat with which I already paint the first shades with …:

Foto27_7.jpg


Theoretically I could renounce it, but I think anyhow that bright looks Red "fuller" if it is painted on before angry darker Red. Then, moreover, the very bright "Scarlet" does not "bang" in such a way.

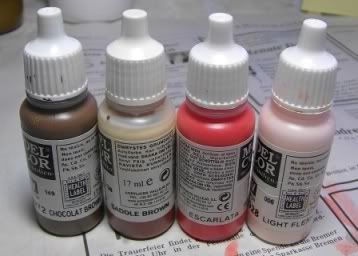
Then the final painting occurs with these colours and "Scarlet" of course the „weight-bearing column“ is …:

Foto27_8.jpg


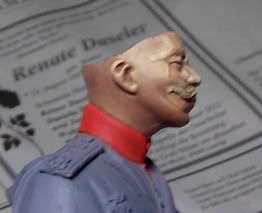
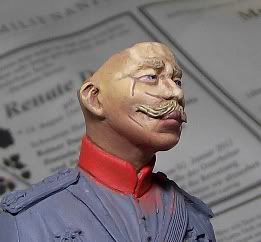
In front and under the jaw as well as in the lateral parts of the collar I paint relatively dark shades …

Foto27_9.jpg


Foto27_9_1.jpg


Foto27_10.jpg


Foto27_10_1.jpg


Foto27_11.jpg


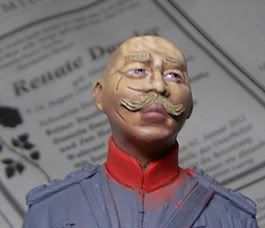
… and in the back I permit to myself a light – indeed, only very cautiously, because we we still in the shadow area of the cap consider …:

Foto27_12.jpg


Foto27_12_1.jpg


Foto27_12_2.jpg


It is also important to me that the tone of the "Beshmet" shirt of the cap lid of the "Kubanka" corresponds …:

Foto27_13.jpg


As far as for today! But if I have a look at the photos, I will have to do still something behind at the collar.

Till then I wish You a nice week-end!

And @Andy:
Thanks for your e-mail with the improvement suggestion! I will make this the next week and show it then here.
 
28. Day, 9. January 2012

My painting week begins with some fine tuning in the rear collar.

Now the light sedate there is less bright, for it, however, a little broader and the crossings are better blinded than before.

Moreover, I have taken a proposal from an other forum to take orange for lightening …:

Foto28_3.jpg


All together looks such a thing more harmonious and "softer" – as well as I want to have it …

Foto28_1.jpg


I will paint the rest of the shirt now first of all with my original mixture, how the collars and the cap lid.

Why complicates so? Because I will have the same "subsoil" then for all red "materials".

And if I am ready with the shirt afterwards I will make up the clarifications with orange gently.
 
29. Day, 10. January 2012

Today the shirt breast is it!

Because it concerns with the "Beshmet" relatively thin material, I paint the box pleats nicely "deeply".

I pack most light on the breast, because the higher areas lie because of chin and cap in the shadow area.

Foto29_1.jpg


Foto29_2.jpg


Foto29_3.jpg


I have not forgotten that I will treat the entirety in the end still with orange after: This still comes.

The button strip I must still rise meanwhile. I have bumped because there into a detail which needs still any recherche:
The colour of the buttons.

There I must dig up once more my picture-fund.

Unfortunately, I can continue only the Day after tomorrow because I am tomorow not in Bremen. Then more in addition.
 
30. Day, 12. January 2012

Now, finally, I can paint the button strip!

Reason for the delay was a look at the promo painting of the bust of song Eon Lee.

Song Eon has shown the small round buttons because as a metal (silver).

http://www.planetfigure.com/forums/attachment.php?attachmentid=80168&d=1321327941

Because I this liked very well I have thinned out once more my whole documents whether I can book silver metal buttons in a Caucasian "Beshmet" shirt anyhow.

Unfortunately, I have found nothing something similar. In contemporary documents most by far the buttons corresponded at that time to the colour of the shirt.

Foto30_7.jpg


Foto30_6.jpg


Foto30_8.jpg


Mine become accordingly red …:

Foto30_2.jpg


Foto30_5.jpg


Foto30_4.jpg
 
31. Day, 13. January 2012

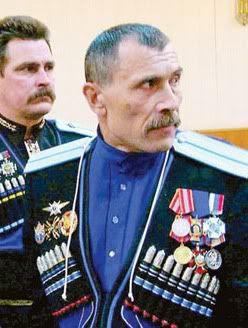
As the next the braids come in the "Tscherkesska" to the row as this typical Caucasian coat was called.

Moreover also again some theory before:

According to rank, predilections and also financial possibilities the Tscherkesskas of Cuban- and Terek Cossacks with silver braids were decorated.

Besides, gold was never used, the colour of the Cossacks was silver!

So long one moved in a certain – unwritten – frame, the owner of the Tscherkesska could decide himself in which extent he decorated his coat, because the Tscherkesska private property of the bearer were.

Clear that a Proportschik (ensign) to themselves could not sew on braids, how an Ataman (general).

The both next photos should make clear what I mean:

Here we have quite a simple version …:

Foto31_1.jpg


… and here the version of a higher officer …:

Foto31_2.jpg


Our friend moves with his braid decorations possibly in the middle of this spectrum.

Thus I had suggested it to Andy – and thus he has modeled it of commendable manner.

Now, however, to the painting of the braids:

First it becomes with …

Foto31_3.jpg


… primed.

Then there are used metal colours which I not brush on but with many small – always diagonal – lines piece around.

I make this brushing in three steps:

The first step:

Foto31_4.jpg


The second step:

Foto31_5.jpg


In the end the edges turned a piece higher with:

Foto31_6.jpg


The effect which originates is that there is no homogeneous shining surface, but that the braid gleams softly.

It is difficult to to take realistic photos, because the electronics of my camera inclines to smooth the effect, so to speak.

In the realistic it still looks in the both next pictures – in reality one sees more …:

Foto31_7.jpg


In the above picture one can see good, by the way, that I have made a mess above the edge on the red shirt. This is immediately still corrected!

Here one can recognise the artificial effect also well …:

Foto31_8.jpg


And as you can see, today I have painted only one side ready, the other is only primed with grey (yellow arrow!).

One can recognise on the ready side, however, rather well the lightened edge – indeed, my camera has the light effect also here simply road-blinded.

In the most I am "glad" about the lower part of the braid (red arrow!) in which one comes very hard near, because it lies in a "Hole".

Foto31_10.jpg


There I will work on next Monday…

There are oh yes, two corrections still to report:

Andy, the creator of the bust reads this sbs with and had suggested to me, (on the photo!) to widen right eyebrow something, because it was narrow as the left one.

Is made, Andy – and many thanks for the tip!

Foto31_11.jpg


Moreover, I have with the "Beshmet" shirt, treats as already announced, the clarifications with orange after.

Foto31_12.jpg


Comes much better, I find.

And so that everything fits, it is treated of the Stoffeckel of the "Kubanka" cap also so …:

Foto31_13.jpg


And now I wish You a nice Weekend!
 
32. Day, 16. January 2012

The new week begins as the old one ended.

Painting braids …:

Foto32_1.jpg


Foto32_2.jpg


Foto32_3.jpg


And tomorrow I want to experiment then a little bit with black.
 
33. Day, 17. January 2012

Today I have started experimenting with the black with which I would like to paint the Tscherkesska.

The first attempt on the back with …

Foto33_1.jpg


… ended so catastrophically that I had to apply my radical method, and
has decolorized the area again completely.

I do not mean "catastrophically" less in technical regard, but the colour which has come out with my mix simply at all!

This "Light Blue" was simply the wrong addition, there has come out a rather medium grey tone which would be well suited to the representation of certain details as for example "boot shine", but not to the representation of a deep black garment!

Clear, I could paint about that and make all that darker, but I would absolutely like to avoid that the colour order becomes too thick at the end.

So: „Everything away again!“

In addition I take …:

Foto33_2.jpg


… and takes with the alcohol-watered paintbrush line around line and coat of paint around coat of paint – and afterwards the priming - again. Lasts almost longer, than to paint the place …

Do you know such days?

The days in which one believes to have forgotten overnight everything what one has appropriated for years? It goes for me just in such a way …

The result of my "working day" is – frustration!

Foto33_3.jpg
 
Tanks, Roger!

---------------------------

34. Day, 18. January 2012

The reconstruction of the so unsuccessful place yesterday begins.

Today the primer gets on as again. Because it must be sprayed, it depends above all on the clean masking of the already painted places:

Back of the head and collar must be protected above all! The whole head disappears under a "hat" which I have made of an old toilet paper role.

Moreover, I want to avoid that on the remaining undercoated, but not yet to painted places of the back too much from my priming lands – I would destroy all the fine details .

So the remaining back is also disguised for what I am founded "flying masks".

Foto34_1.jpg


Then comes the primer in it.

Wage of the trouble: The spray stuff has only landed where I wanted to have it …

Foto34_2.jpg
 
35. Day, 19. January 2012

Black to the second:

This time I take these colours …:

Foto35_1.jpg


Besides, I would like to have my black as darkly as only at all possibly because these Tscherkesska coats were pitch-black in reality.

With the putting of lights I am very reserved again, moreover, I have distributed light and shade consciously asymmetrical, because I include the light head rotation of the bust.

The brightest light is on that (in the picture!) right shoulder, the deepest shades to them exactly towards in lower (in the picture) left segment.

The lights on the collar were adapted – the brightest light "walked" a little to the right. Oh yes, as one sees in one picture, the colour is not at a place yet quite drily …:

Foto35_3.jpg


Foto35_2.jpg


In the pictures the whole matter a kink looks brighter than it is in reality. I am quite contented with it …
 
36. Day, 20. January 2012
T
Today I have not made even more, than to try out my "black" in the front.

The colour blending comes on the today's photos now much better than yesterday and looks realistically "black"…:

Foto36_2.jpg


This makes the really desire on more! The next week.

Nice week-end to You to all!
 
Back
Top