Steve Ski
PlanetFigure Supporter
RM1601 Resin, 4 figures plus groundwork. http://www.reedeesminiatures.co.uk/products/1-16-120mm
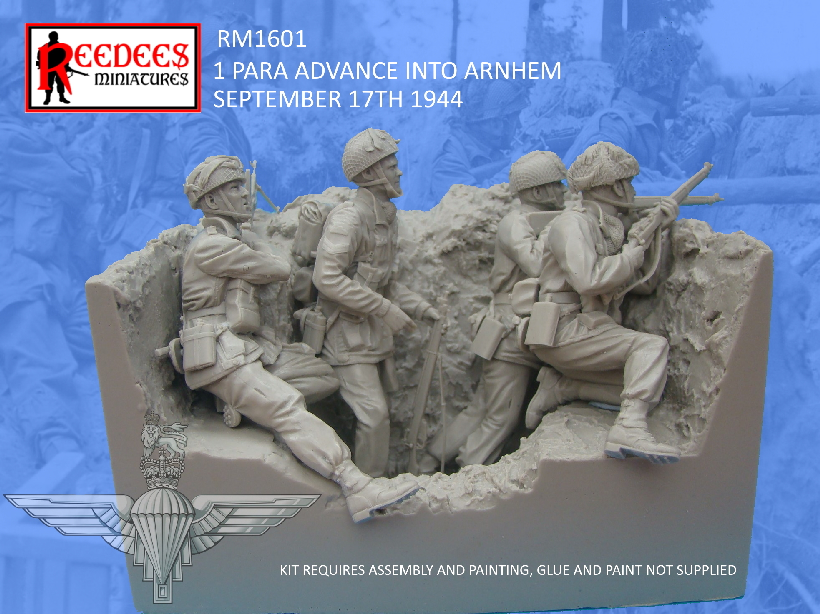
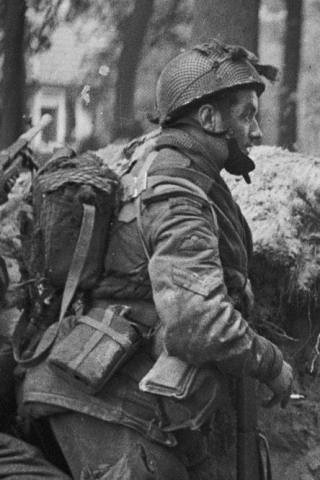
This excellent vignette, first in a series, was recently sculpted by Steve Reedees and is now available through his website. The historical photo below was used as his guide in creating this scene. It's not too often you find vignettes in 1/16 scale that are directly related to an actual photo and I think Steve pulled this one off superbly.

Using Steve's own words to describe the scene: " The first release is RM1601 which is taken from a photo taken 17 September 1944 during Operation Market Garden at Wolfheze Village. It shows a Bren gun section of R Company 1 Para taking cover in a Bomb crater during their advance along Amsterdamseweg (Leopard Route)."
"Corporal Alfred Reynolds, second from left, who commanded the Bren gun section was seriously wounded a few hours after the photo was taken, he fell into German hands a died from his injuries a day or two later."
The fate of the other three is unknown.
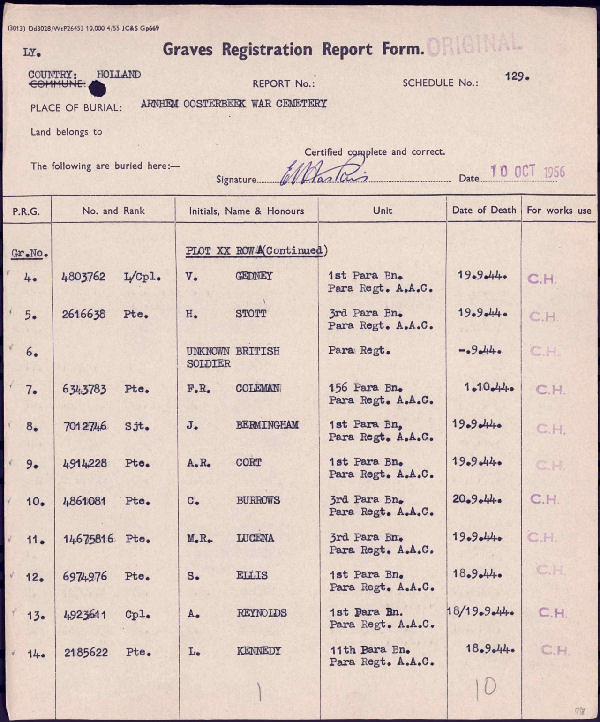
More historical data on this scene and the unit involved was posted on this forum by Martin Rohmann, a "fixture" over here at Planet Figure, known for his incredible ability to dig up historical information on battles and campaigns. Martin has found a Grave Registration Report Form and a photo of Corporal Reynolds' grave marker. Thank you Martin!
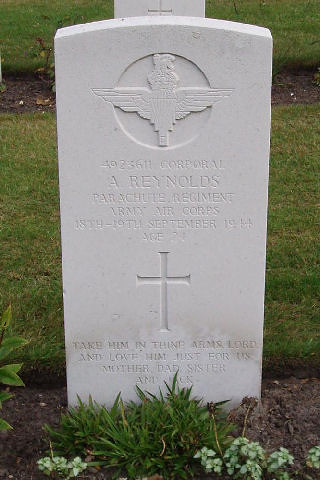
Personally, I think Steve did an incredible job honoring the memory of these Chaps and the unit involved with this vignette. Now I will attempt to do the same with this SBS and get to "sniffin paint and gluin my fingers together" in the process. This is my first go at British uniforms or camo patterns, so I'll be going through the learning curve as we go along. Buckle up, here we go...........
What's in the kit?
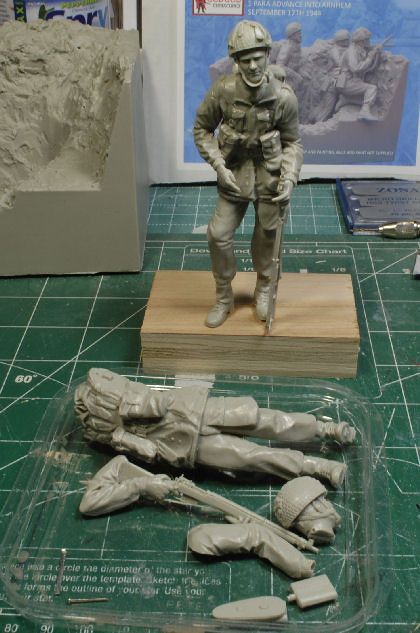
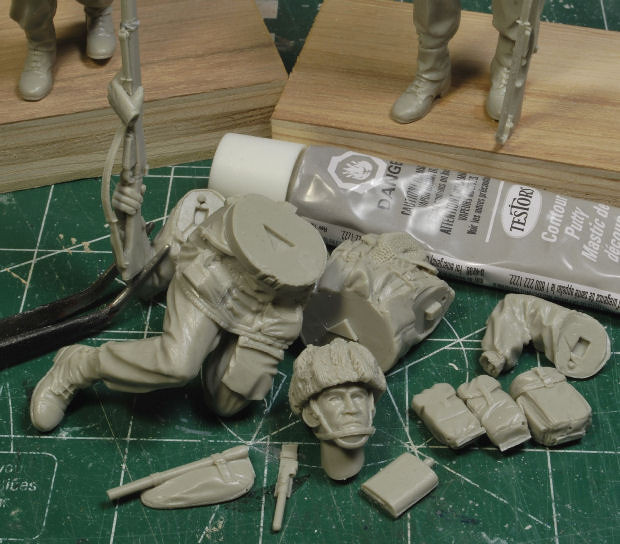
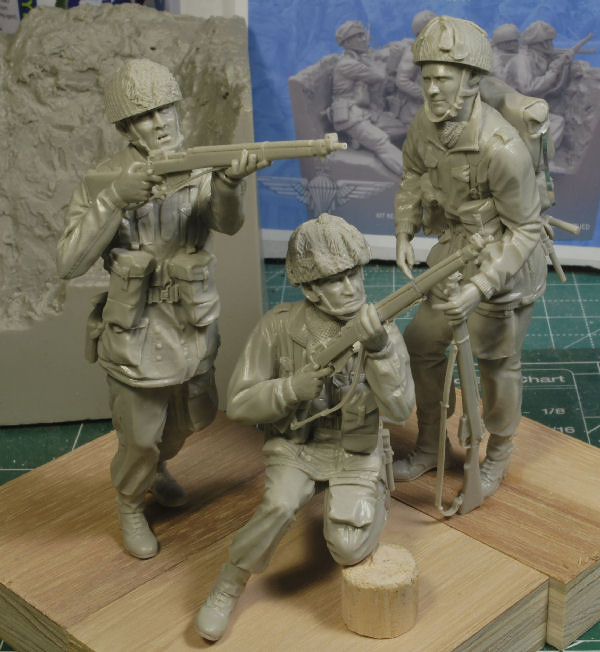
Here's what comes in the kit, four superbly sculpted figures in gray resin, and an excellent rendition of the crater seen in the historical photograph.
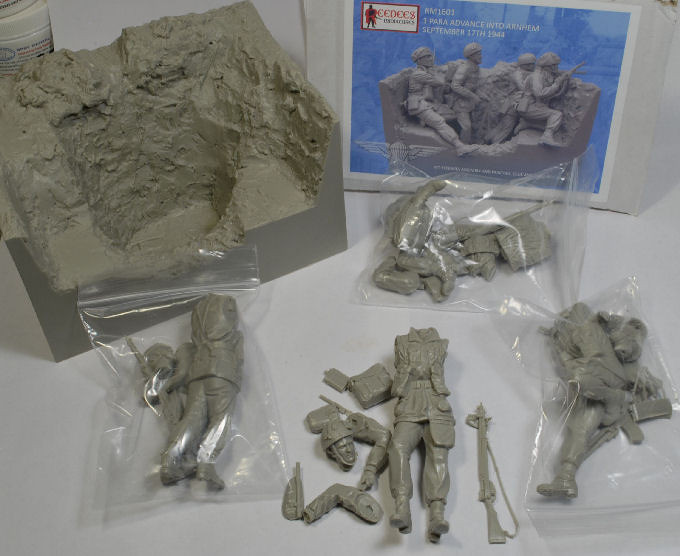
What I noticed right off was the clean mold work and the sparse amount of seams that requiring filing. These figures were molded with care and it shows. There's even "locking lugs/ keyways" on all the arms and torsos, as well as a lot of the equipment, which makes for some real easy assembly. Another note of importance is where the arms meet the torso, the uniform folds actually overlap areas of the torso. There really isn't much putty work to do when you have resin that locks together so cleanly. Pretty impressive.
First figure up, Corporal Reynolds!
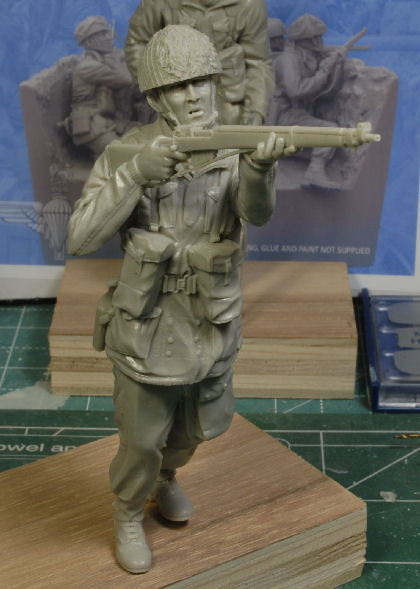
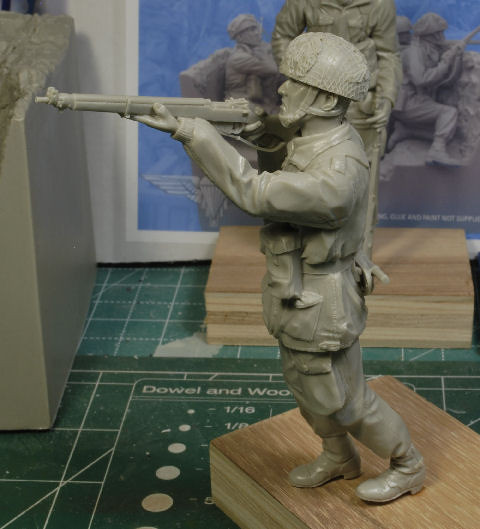
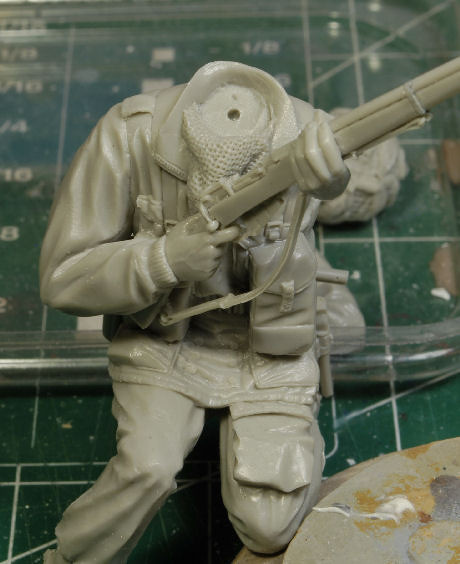
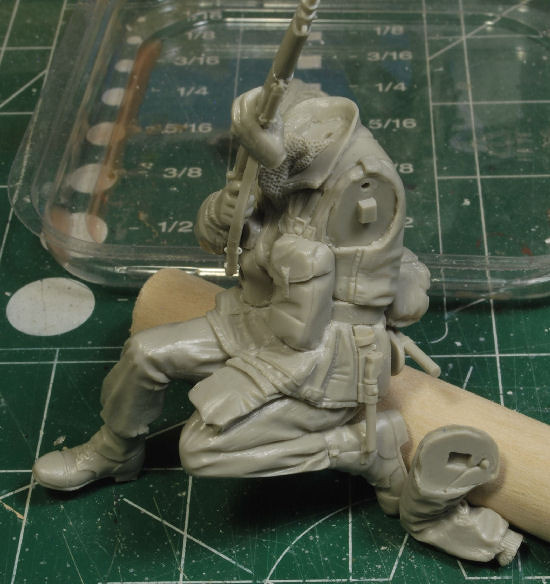
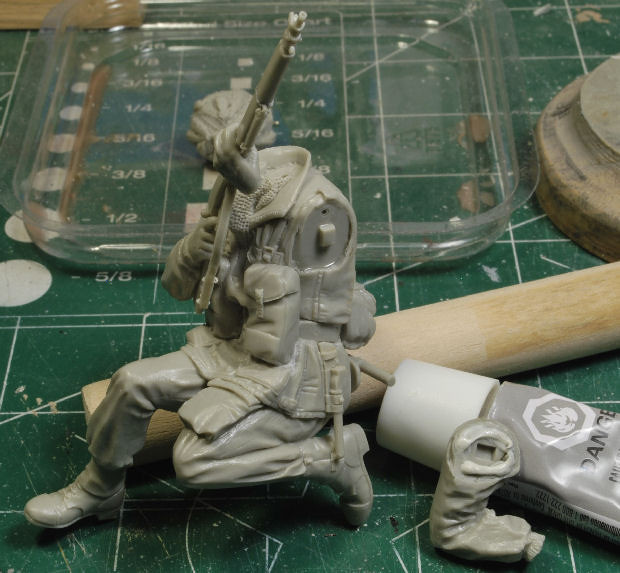
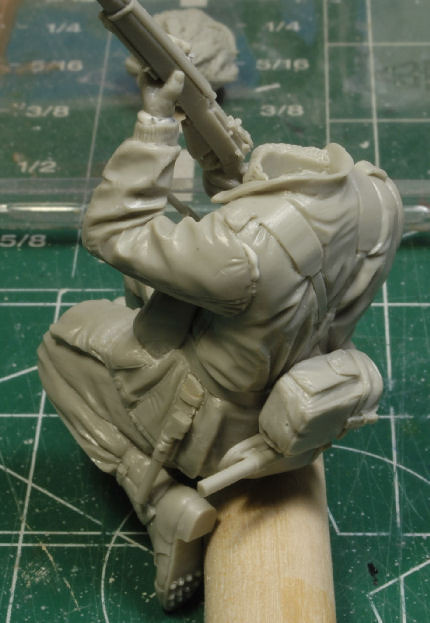
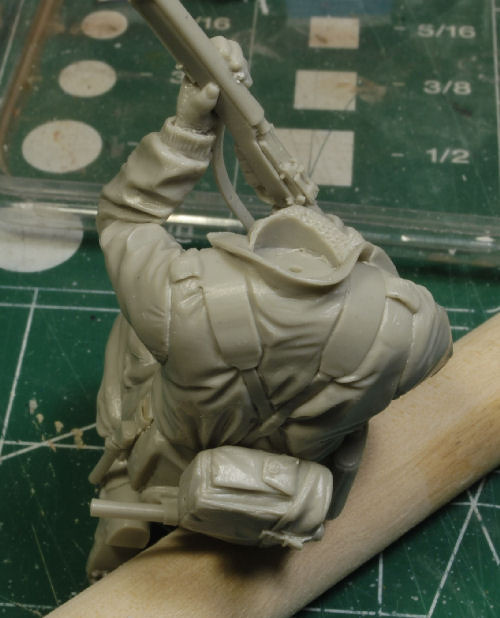
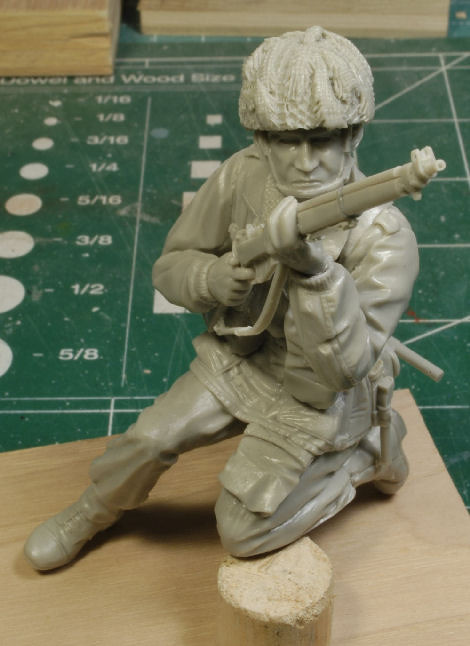
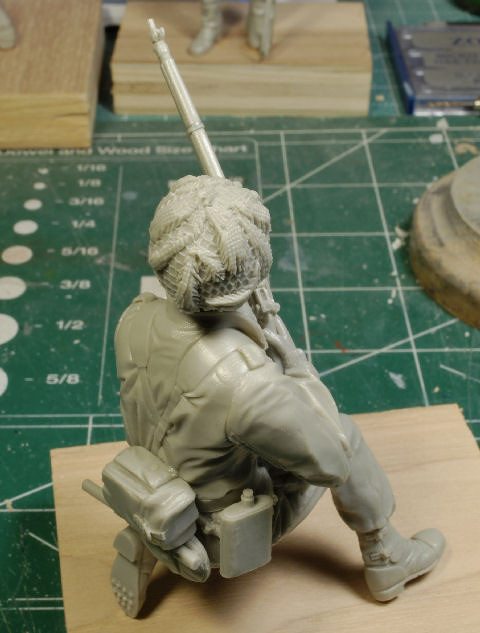
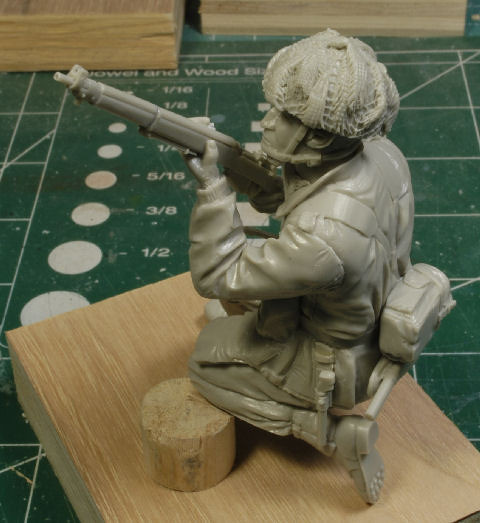
Here we have the "Corporal Reynolds" figure completed. There wasn't much clean up to be had, really. There will always be some kind of mold lines visible in some locations, but very minor in this case. About the only real clean up for me was scrutinizing every little nook and cranny for any left over resin bits from the molding process. I used a dull dental pick to get any tiny bits that were found, but it wasn't much.
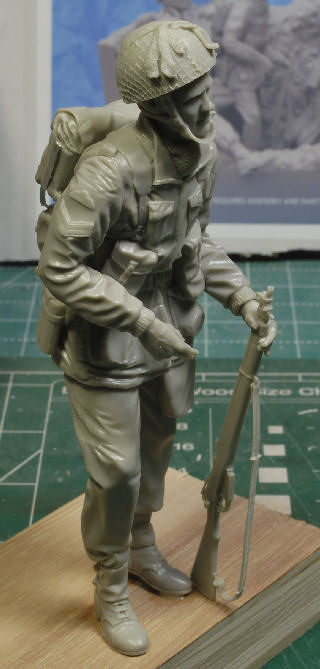
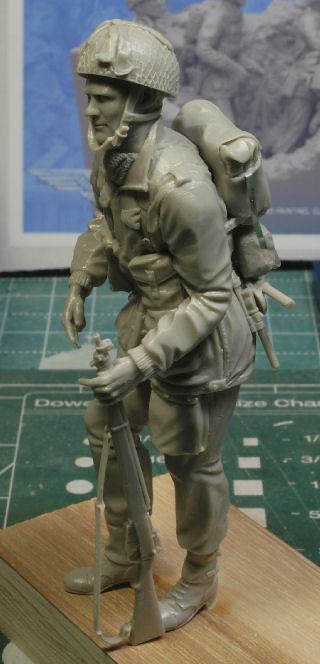
The rifle mold was incredibly clean as well, but you still need to be super careful around the rifle strap so you don't end up breaking it. It's a delicate area and I did have a small amount of slag to remove, but mostly it was just little "feathers" of resin reside. I did bore out each and every rifle muzzle like I always do. Take your time when doing this, it's a delicate area as well.
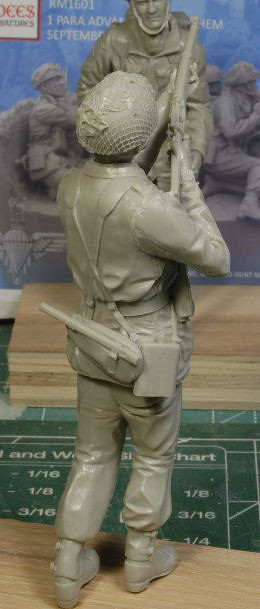
I added a strap for the Corporal's back pack as seen in the historical photo. I used a strip of pewter for this because it's just much easier to mold and shape than other materials. I dug out a bit of the resin on the pack for the strap ends and super glued them in place. Once the glue was set I formed the strap to a more natural appearance. I'll be readjusting that strap after the paint process, but for now, it's good to go.
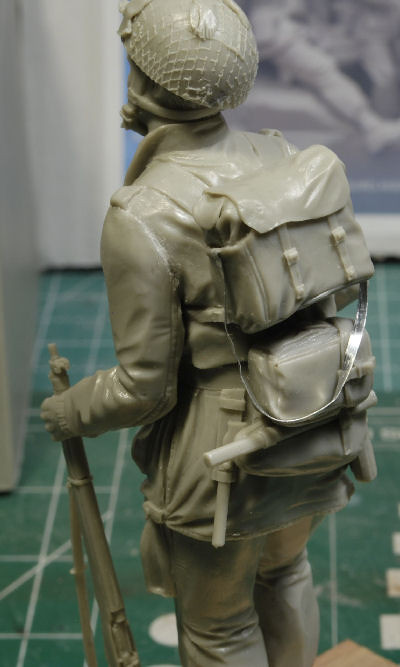
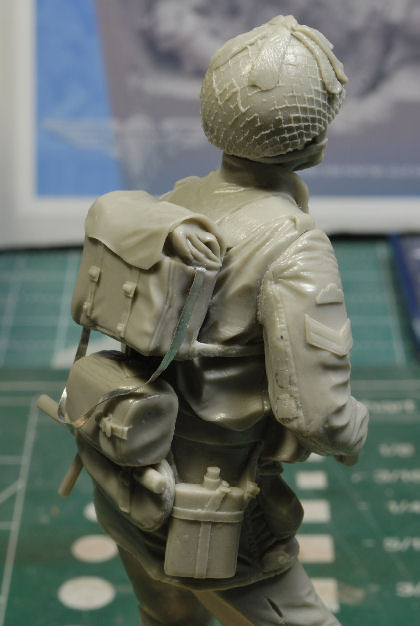
And lastly, each figure will be mounted on scrap plywood for ease of handling during the painting process. I always drill deep into the boots and install a sewing pin which will remain for final mounting into the crater when we're all done. Corporal Reynolds is now ready for primer and paint.
One last note for all the figures in this vignette. I used Elmer's wood glue to attach the heads for easy removal after the initial priming. I always like to paint the heads separate from the figures and a lot of times any flesh areas as well, if they can be kept separate without much difficulty. Nothing worse than trying to twist a brush into a tight spot, right?
More to follow soon. Cheers, Ski.

This excellent vignette, first in a series, was recently sculpted by Steve Reedees and is now available through his website. The historical photo below was used as his guide in creating this scene. It's not too often you find vignettes in 1/16 scale that are directly related to an actual photo and I think Steve pulled this one off superbly.

Using Steve's own words to describe the scene: " The first release is RM1601 which is taken from a photo taken 17 September 1944 during Operation Market Garden at Wolfheze Village. It shows a Bren gun section of R Company 1 Para taking cover in a Bomb crater during their advance along Amsterdamseweg (Leopard Route)."
"Corporal Alfred Reynolds, second from left, who commanded the Bren gun section was seriously wounded a few hours after the photo was taken, he fell into German hands a died from his injuries a day or two later."
The fate of the other three is unknown.
More historical data on this scene and the unit involved was posted on this forum by Martin Rohmann, a "fixture" over here at Planet Figure, known for his incredible ability to dig up historical information on battles and campaigns. Martin has found a Grave Registration Report Form and a photo of Corporal Reynolds' grave marker. Thank you Martin!


Personally, I think Steve did an incredible job honoring the memory of these Chaps and the unit involved with this vignette. Now I will attempt to do the same with this SBS and get to "sniffin paint and gluin my fingers together" in the process. This is my first go at British uniforms or camo patterns, so I'll be going through the learning curve as we go along. Buckle up, here we go...........
What's in the kit?
Here's what comes in the kit, four superbly sculpted figures in gray resin, and an excellent rendition of the crater seen in the historical photograph.

What I noticed right off was the clean mold work and the sparse amount of seams that requiring filing. These figures were molded with care and it shows. There's even "locking lugs/ keyways" on all the arms and torsos, as well as a lot of the equipment, which makes for some real easy assembly. Another note of importance is where the arms meet the torso, the uniform folds actually overlap areas of the torso. There really isn't much putty work to do when you have resin that locks together so cleanly. Pretty impressive.
First figure up, Corporal Reynolds!

Here we have the "Corporal Reynolds" figure completed. There wasn't much clean up to be had, really. There will always be some kind of mold lines visible in some locations, but very minor in this case. About the only real clean up for me was scrutinizing every little nook and cranny for any left over resin bits from the molding process. I used a dull dental pick to get any tiny bits that were found, but it wasn't much.


The rifle mold was incredibly clean as well, but you still need to be super careful around the rifle strap so you don't end up breaking it. It's a delicate area and I did have a small amount of slag to remove, but mostly it was just little "feathers" of resin reside. I did bore out each and every rifle muzzle like I always do. Take your time when doing this, it's a delicate area as well.
I added a strap for the Corporal's back pack as seen in the historical photo. I used a strip of pewter for this because it's just much easier to mold and shape than other materials. I dug out a bit of the resin on the pack for the strap ends and super glued them in place. Once the glue was set I formed the strap to a more natural appearance. I'll be readjusting that strap after the paint process, but for now, it's good to go.


And lastly, each figure will be mounted on scrap plywood for ease of handling during the painting process. I always drill deep into the boots and install a sewing pin which will remain for final mounting into the crater when we're all done. Corporal Reynolds is now ready for primer and paint.
One last note for all the figures in this vignette. I used Elmer's wood glue to attach the heads for easy removal after the initial priming. I always like to paint the heads separate from the figures and a lot of times any flesh areas as well, if they can be kept separate without much difficulty. Nothing worse than trying to twist a brush into a tight spot, right?
More to follow soon. Cheers, Ski.


